At a Glance: Component File Expiration (The Publishing Wizard)
A
B
C
D
After opening  Publishing Wizard from the toolbar (or Tools menu) in your HotDocs Library you will be presented with a series of dialogs containing different options for publishing templates and template sets.
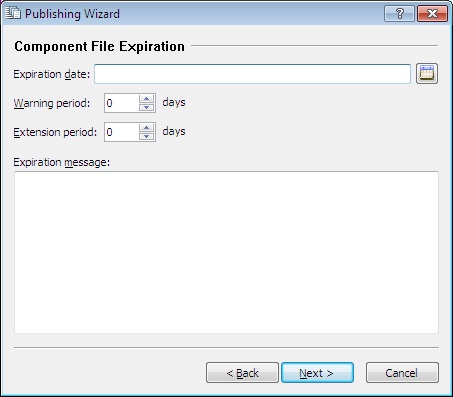
If you choose to set an expiration date for your component files in the File Security dialog then the Next button would take you to the Content File Expiration dialog where you can set these options.
In the first text field A you can type the expiration date you would like to give the component files, or you can click on the  Calendar button to the right of the text field to select a date.
Below this text field are two number fields. In the first field B you can use the arrows or type a number to set the amount of days prior to the expiration date HotDocs will display the expiration message to warn the user. In the second field C you can use the arrows or type a number to set the amount of days after the expiration date that the user will still be able to use the templates.
In the large text field D you can type in an expiration message that the user will see along side the HotDocs warning showing the expiry date. By default, when a user attempts to use a template that is either going to expire or has already expired, HotDocs automatically displays a warning message that gives these details, including the expiration date. You can include additional information that will appear in this message box -- for example, contact information for obtaining an updated template or template set.
You can move along to the next dialog by clicking the Next button.
To learn more about setting the component file expiration options follow the link below: