


Configuring ApacheDS
You must configure ApacheDS before it can be used with HotDocs Hub.
In this Topic Hide
Default Connection
The follow steps describe configuring a default connection between ApacheDS and HotDocs. Please refer to the ApacheDS documentation if you need to create a custom connection.
To configure ApacheDS for use with HotDocs Hub
1. Initial Connection Setup
- Run Apache Directory Studio.
- Right-click the Connections
pane.

- Select New Connection from
the drop-down menu.
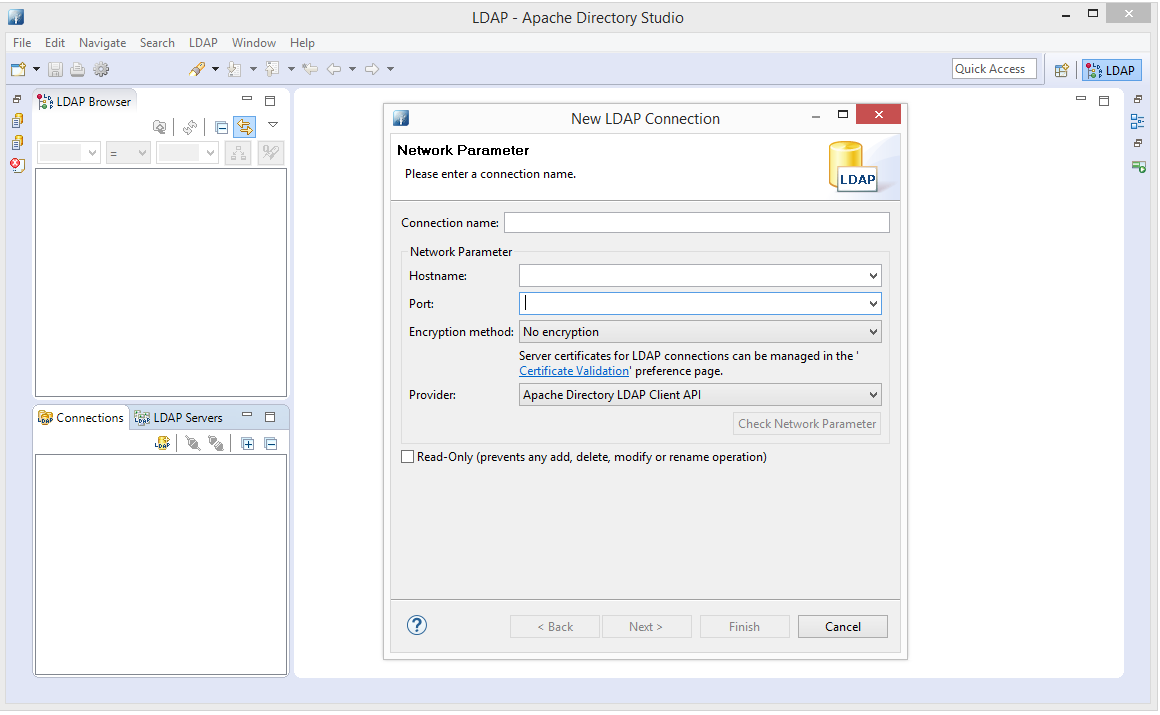
- In the Connection name field, type hotdocshub.
- In the Hostname field, type the full, including your organization's domain; for example, server.yourorganization.com
- In the Port field, type 10389.
- Click Next.
- In the Authentication Method
field, select Simple Authentication.
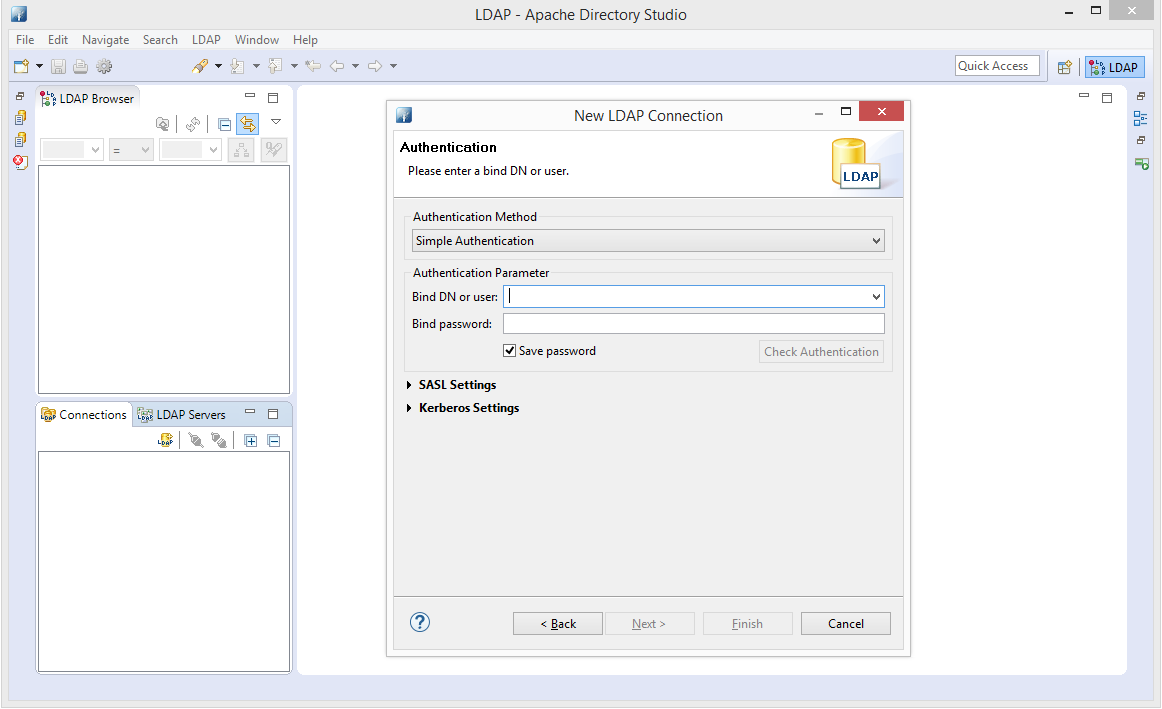
- In the Bind DN or user field, type uid=admin,ou=system.
- In the Bind password field, type the password for the Bind DN entered above; the default password for uid=admin,ou=system is secret.
- Click Finish.
Note: This guide refers to the uid=admin,ou=system default bind DN in later configuration steps. If you use a different bind DN, you should use that in place of uid=admin,ou=system.
2. Execute the LDIF file
- Expand the DIT node in
the LDAP Browser pane.
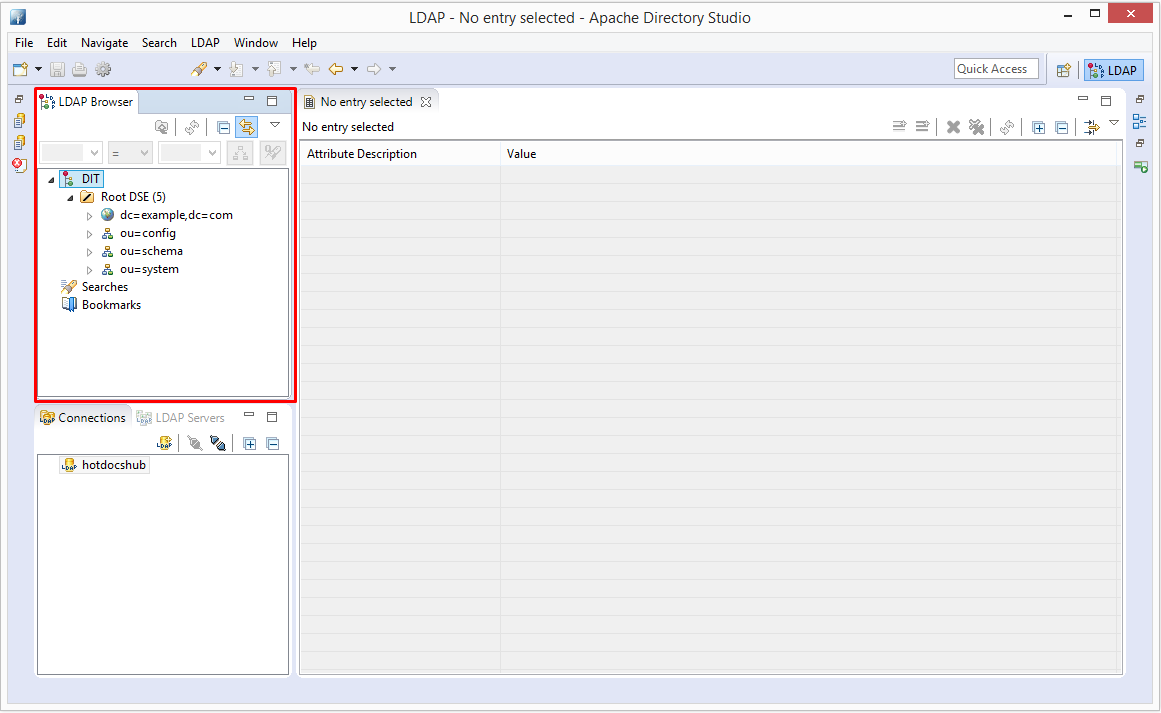
- Select the Root DSE node.
- Select File > Open File.
- Navigate to the LdapFiles folder supplied with your HotDocs Hub installation package.
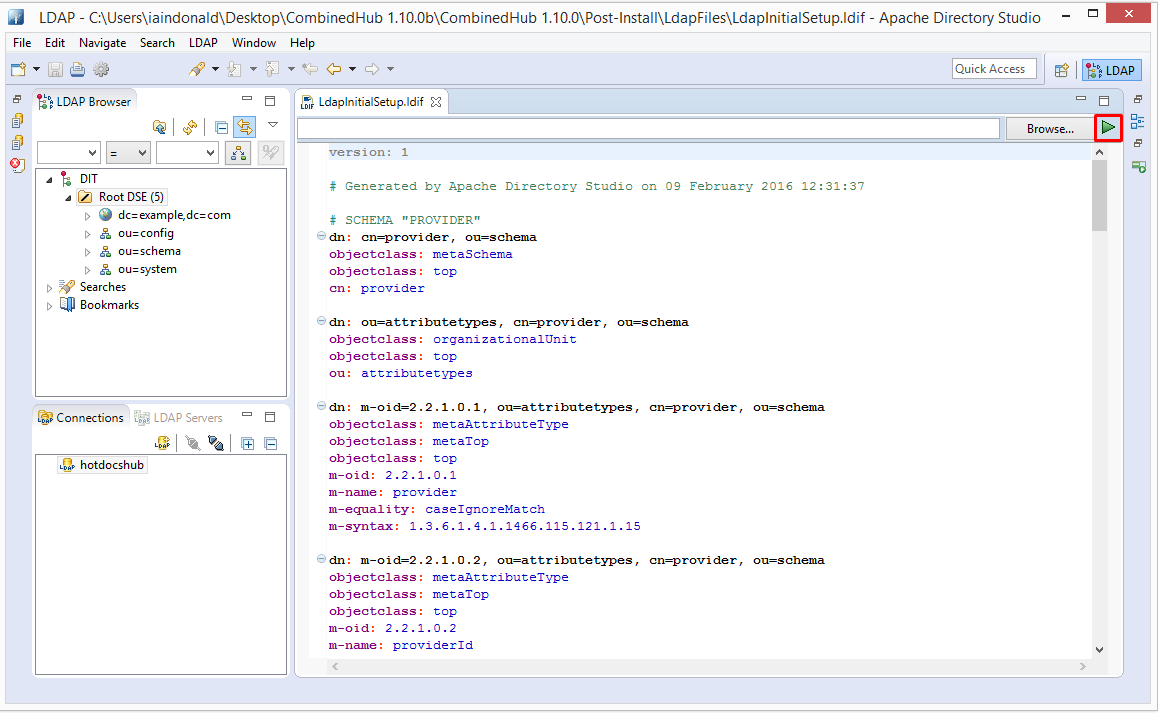
- Select the LdapInitialSetup.ldif file.
- Click Open.
- Click Execute LDIF (
 ) to execute the selected .ldif file.
- Select the connection you created above from the Select Connection list.
- Click OK.
3. Tenancy Configuration
- Navigate to DIT > Root DSE in the LDAP Browser pane.
- Expand the dc=example,dc=com node.
- Right-click the cn=HotDocs group.
- Select Properties
from the drop-down menu.
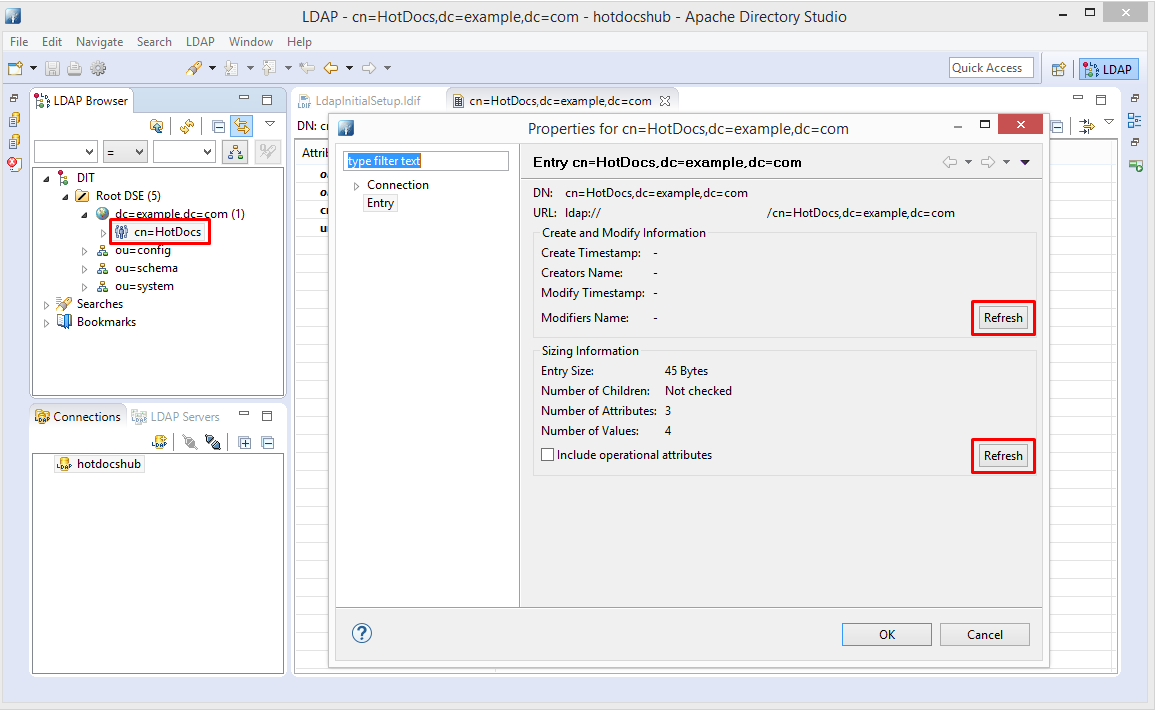
- Click both Refresh button in the Create and Modify Information section.
- Click the Refresh button in the Sizing Information section.
- Click OK.
- Right-click the entryUUID
value from the cn=HotDocs group tab.
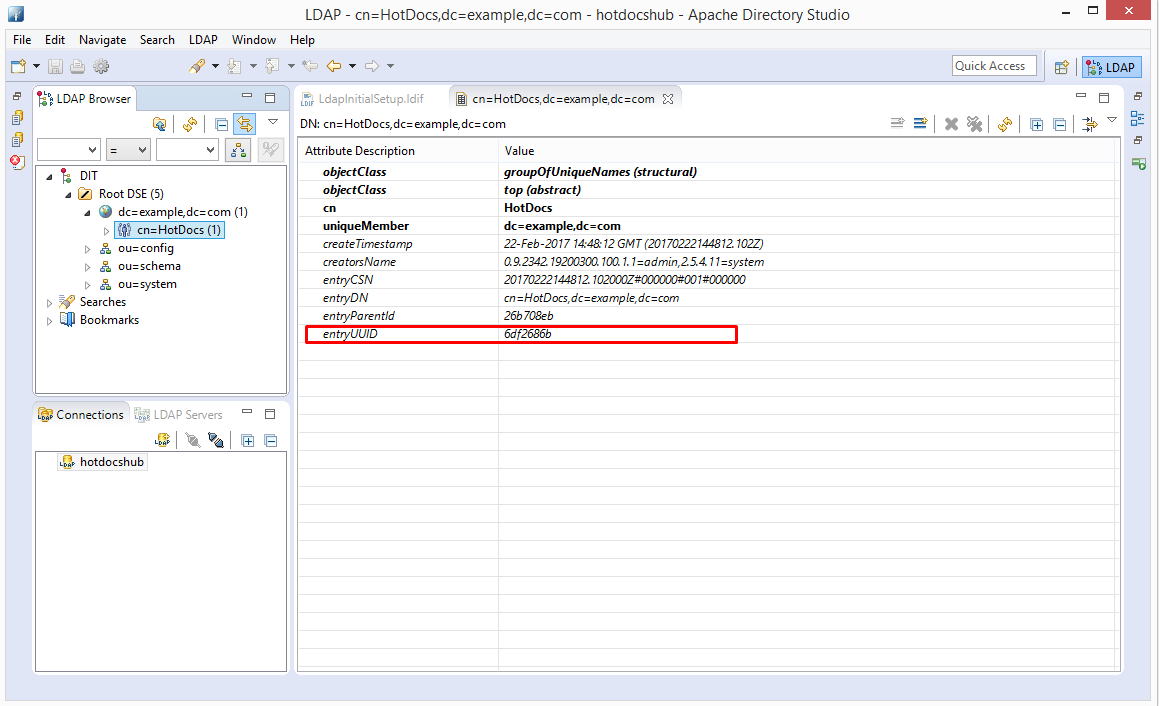
- Select Copy Value.
- Paste and save the value in a text file; the ApacheTenancy setting in the HotDocs Hub post-installation scripts uses this value later.
4. Set the root administrator e-mail and password
- Expand the cn=HotDocs group node in the LDAP Browser pane.
- Select the cn=admin user;
this is the initial administrator user for Hub.
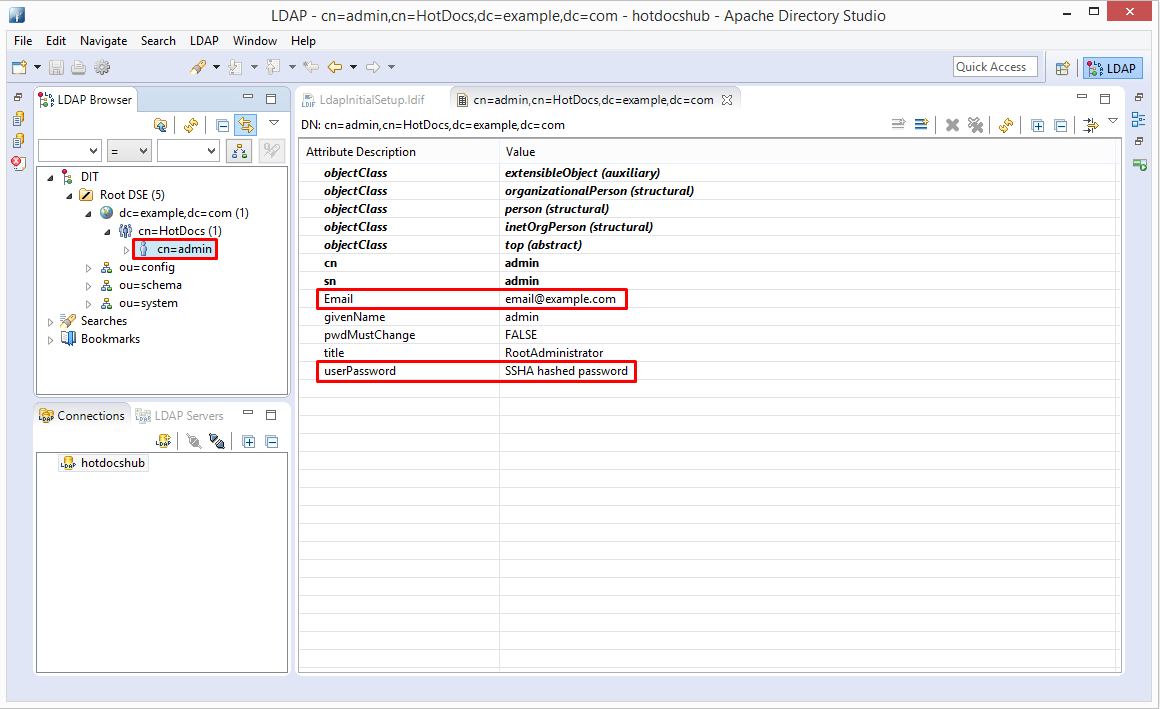
- Edit the Email attribute.
- Enter the e-mail address for the root administrator.
- Right-click the userPassword attribute; the value set for this attribute is the password for the root administrator.
- Select Edit Value.
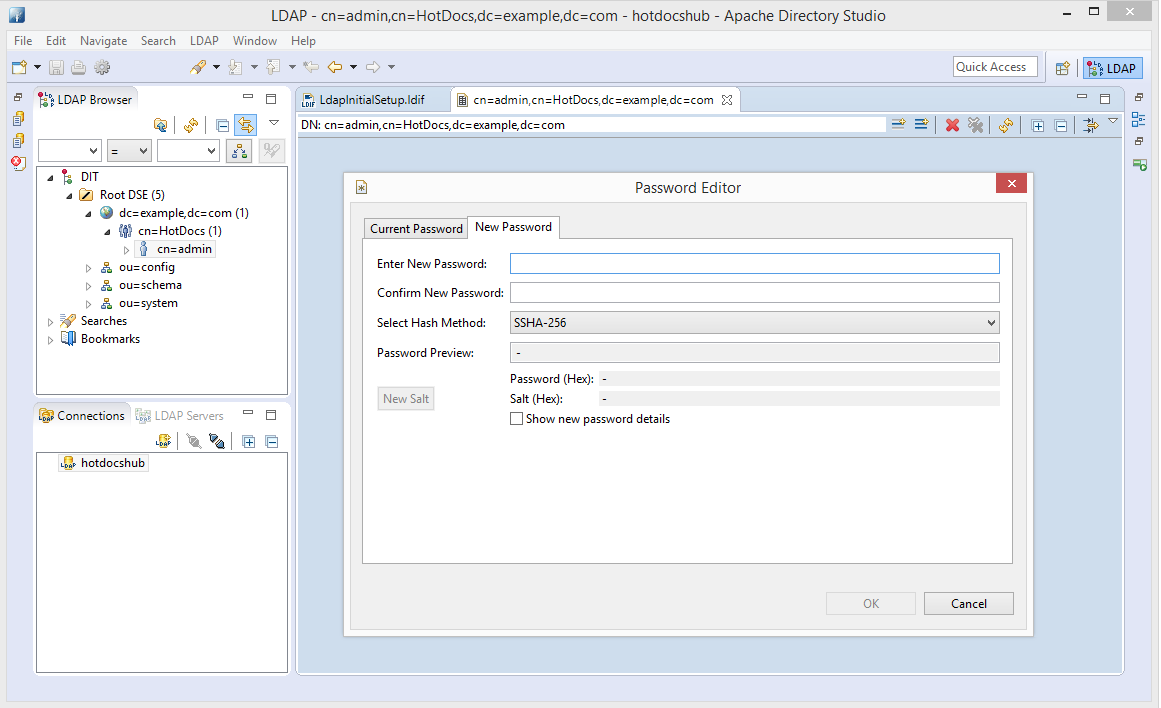
- Navigate to the New Password tab.
- Enter a password in the Enter New Password field.
- Enter the password in the Confirm New Password field.
- Select SSHA-256 from the Select Hash Method drop-down menu.
- Click OK.
5. Disable Anonymous Access
You must also disable anonymous access for ApacheDS, to prevent unauthorized users from accessing the server.
- Navigate to the Connections pane.
- Right-click the connection to the ApacheDS server.
- Select Open Configuration.
- Uncheck the Allow anonymous access setting.
- Select File > Save to save the configuration.
6. Change the default password for uid=admin,ou=system
To prevent unauthorized users from accessing ApacheDS using the default admin credentials, you should change the ApacheDS admin password.
Note: the ApacheDS admin password is used when installing HotDocs Hub; you should take a note of the new password.
- Navigate to DIT > Root DSE in the LDAP Browser pane.
- Expand the ou=system node.
- Select the uid=admin node.
- Right-click the userPassword attribute in the Attributes pane.
- Select Edit Value.
- Navigate to the New Password tab.
- Type your new password in the Enter New Password field.
- Type your new password in the Confirm New Password field.
- Select SSHA-256 from the Select Hash Method drop-down list.
- Click OK.
7. Password Lockout Configuration (optional)
Optional: you can change the password policy to disable locking of accounts after five incorrect password attempts.
- Navigate to ou=config > ads-directoryServiceId=<default> > ou=interceptors > ads-interceptorId=authenticationInterceptor > ou=passwordPolicies > ads-pwdld=default
- Edit the ads-pwdlockout attribute.
- Enter FALSE as the value for the attribute.
Next Steps
Install HotDocs Hub with User Management and Active Directory.