At a Glance: The Save Answer File Dialog Box
A
C
D
E
B
Illustrations used throughout the help file depict HotDocs Developer and may include features not present in HotDocs Player .
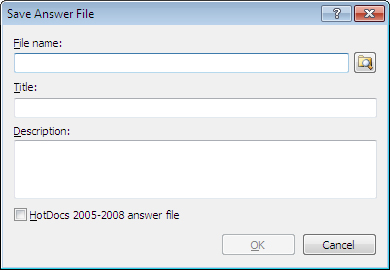
When you come to save an Answer File, either during assembly or after assembling a template, you will be presented with the Save Answer File dialog box.
In the first field A you can enter a file name for the answer file and using the  Browse button B the right of this field you can change where the file will be saved on your computer. If you do not change where the file is to be saved it will be saved to the Answers folder in your HotDocs folder usually in My Documents.
In the next field C you can enter a Title for the answer file. This will be the name displayed when you see the answer file in Answer File Manager or when you use it in a HotDocs Interview.
In the last field D you can enter a brief description of the answer file. This will display with the answer file in Answer File Manager and may help you to identify the answer file you need the next time you come to use it.
Below these text fields is a check box E. Checking this box will have HotDocs save the answer file in a format that is compatible with older versions of HotDocs (see Compatibility of HotDocs 11 Files with Earlier Versions of HotDocs in the Quick Start Guide). This can be useful when you intend to share the answer file with someone who may be running a different version of HotDocs to you.
To learn more about saving answers files follow the link below: