Lesson 4: Attach Text Variables to Fields
Overview
Once you have created answer fields in your template, you can attach variables to each field. A variable determines the kind of answer that can be merged into a field, and it also allows that answer to be saved in an answer file.
This lesson will teach you how to create Text variables and attach them to answer fields in your template. You will also learn how to allow multiple-line answers in a Text variable, assign a pattern to a Text variable, and how to group multiple fields so they can act as a single field.
You may also attach any of the other types of HotDocs variables (Number, Date, True/False, Multiple Choice, Computation, and Personal Information) to answer fields. You will create other types of variables and attach them to fields in subsequent lessons.
Start the Tutorial
If you are continuing immediately from Lesson 3, skip the instructions for opening the template and proceed to “Attach Text Variables to Fields.”
If you closed the template at the end of Lesson 3, complete the following steps.
To open the tutorial template
- Open HotDocs Developer (choose Start
> Programs > HotDocs 11 > HotDocs Developer).
The My Test Templates library
appears.
If the My Test Templates library does not appear, choose Open Library (File menu), select the library in the default Libraries folder (for example, My Test Templates.hdl), and click Open.
- Select Life Insurance Application and
click
 Edit.
The template appears in HotDocs Automator, ready for you to edit.
Edit.
The template appears in HotDocs Automator, ready for you to edit.
Attach Text Variables to Fields
You will first learn how to attach simple Text variables to answer fields. In this template, the first simple Text variable belongs to the Street Address field.
If you have completed the tutorials for automating a text template, you will notice that variable and other component-editing dialog boxes are the same in both HotDocs Automator and in the word processor.
To attach a Text variable to the Street Address field
- Click the Street Address field to select it and then click the
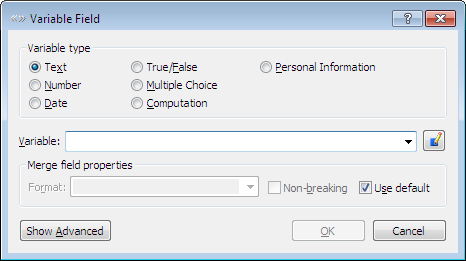
 Variable Field button. (Or, double-click the field.) The Variable Field dialog box appears.

The dialog box lists several types of variables. The Street Address field should contain text, so you will attach a Text variable to it.
- Make sure Text is selected in the Variable type group.
- Type Employee Street Address in the Variable box.
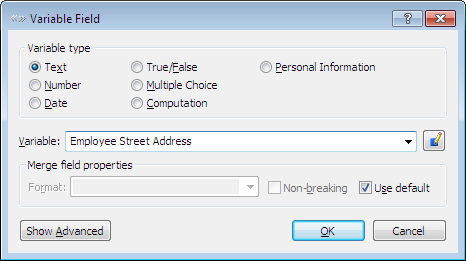
- Click OK. The variable Employee Street Address is created and attached to the Street Address field.
During assembly, the variable prompts the user for an answer, which is then merged into that field. Other fields that use the same variable would also use that answer.
On Your Own
To attach a variable to a field, you can also select a field and press Enter.
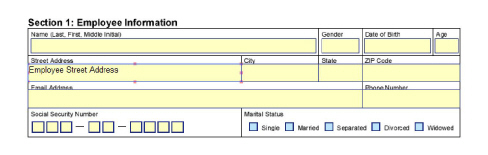
You will now create 12 more Text variables and attach them to fields in the template. (If you need help creating these fields, follow the instructions for creating the Employee Street Address variable, above.) In the Employee Information section, create and attach the following Text variables to the corresponding fields:
Employee City
Employee Zip Code
Employee Email Address
Employee Primary Telephone Number
In the Medical History section, create and attach the following Text variables to the explanation fields:
Explain Smoking
Explain Heart Trouble
Explain High Blood Pressure
Explain Diabetes
Explain Immune Disorder
In the Beneficiary Designation section, create and attach the following Text variables to the corresponding cells in the first row of the table (you will learn more about how this table works in a subsequent lesson):
Beneficiary Name
Beneficiary Telephone Number
Beneficiary Relationship
Format Text Answers
You might think that the Phone Number fields should have Number variables attached to them. However, Number variables are usually reserved for numbers that can be added, multiplied, divided, etc. In the case of telephone numbers, Social Security numbers, and other non-calculated numbers, you should use Text variables.
You could create basic Text variables for the Phone Number fields and rely on users to type the hyphen and parentheses in the appropriate places. However, you can specify a pattern that controls what users can type, how the answer looks as they type it, and how the answer will be merged into the assembled document.
To assign a pattern to the employee’s phone number variable
- Select the Phone Number field in the Employee Information section, and click the
 Edit Component button (found in the Automator toolbar). The Text Variable Editor appears.
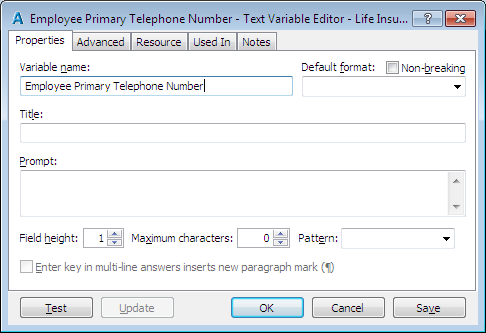
You can create your own pattern by typing it in the Pattern box. (See the HotDocs Help for specific information on creating custom patterns.)
- Click the Pattern drop-down button to display a list of patterns.
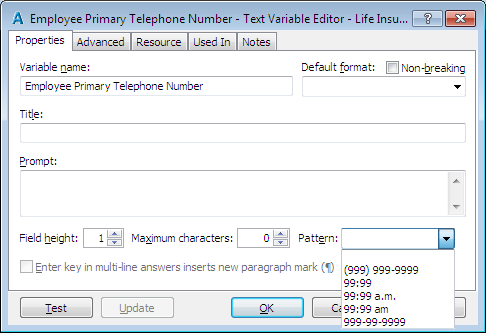
- Select (999) 999-9999.
- Click Test. A test assembly window appears, showing the phone number question. The parentheses and hyphen appear in the answer field, just as they will appear in the field on the form during direct-fill assembly.
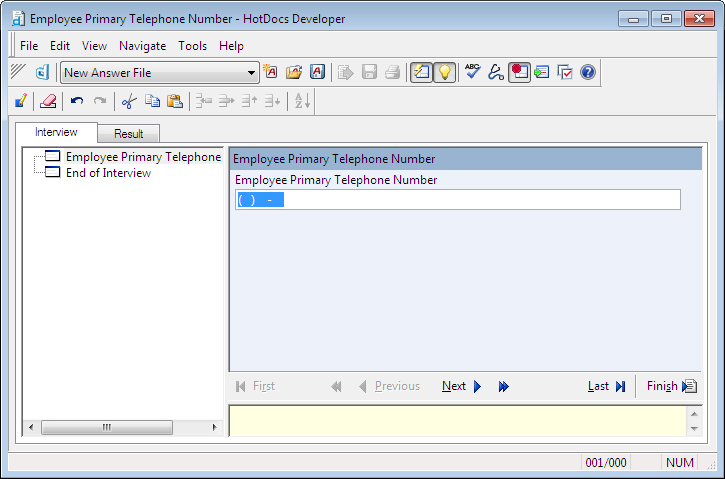
- Enter 8005005555.
HotDocs automatically puts the first three characters within the parentheses, the next three characters before the hyphen, and the last four characters after the hyphen.
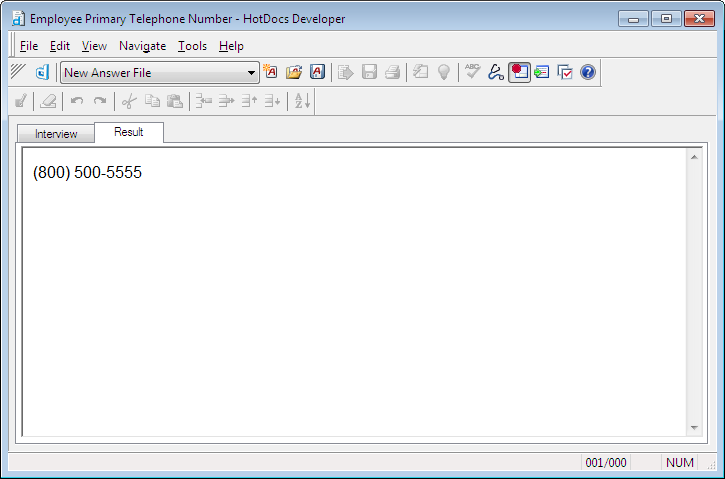
- Click the Result tab. HotDocs shows you how the answer will be merged into the assembled document.
- Choose Close (File menu) to close the test assembly window. Unless you were already using a test answer file, HotDocs asks if you want to save your answers.
- Decide whether to save your answers, based on the following information:
For more information on using test answer files, see the HotDocs Help.
- If you click Save or Save As, you will be prompted to specify an answer file name and title. Type Test Answer File in the File name box and accept the suggested Title. From this point on, this answer file will be used each time you test a variable or test assemble the template, and you will no longer be prompted to save your answers after each test. (You can, of course, choose a different answer file when you are at the test assembly window.)
- If you click Don’t Save, each time you test a variable or test assemble the template, you will use an empty, untitled answer file. You will also be prompted to save your answers each time you finish a test.
- Click OK at the Text Variable Editor.
Now HotDocs will use this telephone number pattern when users answer the Employee Primary Telephone Number variable.
On Your Own
Assign the telephone number pattern to the Beneficiary Telephone Number variable, which you created and attached to a field in the Beneficiary Designation table. Refer to the previous section if you need help assigning this pattern to the variable.
Allow Multi-Line Text Answers
When you create a multi-line field in the form and attach a Text variable to it, you often need to adjust the height of the answer field in the interview so that users can more easily enter a longer answer. In the Medical History section, you will attach Text variable fields to each of the explanations. You will also increase the answer field height for each variable so users can enter a lengthy answer during the interview, if they need to.
To allow multiple lines of text in an answer field
You can also right-click on any field and select Edit Component from the shortcut menu.
- Select the Explain Smoking answer field and click the
 Edit Component button (or press Ctrl+E). The Text Variable Editor appears.
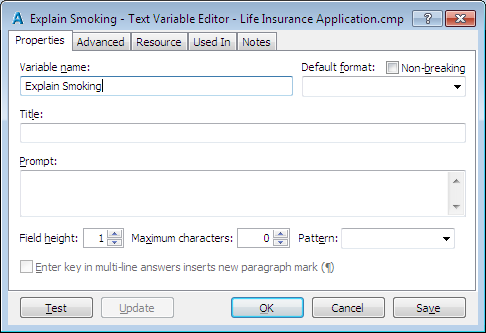
The Field height setting only affects how tall the answer field is in the interview. To limit the actual number of characters a user can enter, change the Maximum characters setting.
- At the Field height box, click the up arrow until the number 3 appears.
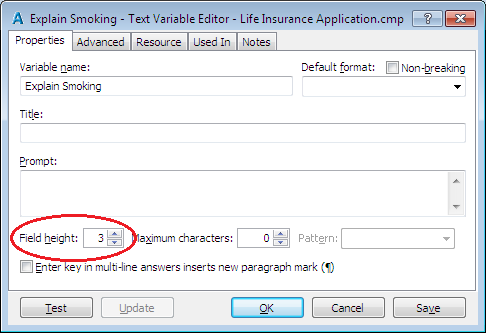
- Click OK at the Text Variable Editor.
Now, users can enter hard returns or long sentences that wrap from one line to the next in the answer.
On Your Own
Edit the remaining Text variables in the Medical History section to allow multiple lines of text. Refer to the instructions in the previous section if you need help doing this.
Assign a Text Variable to a Group of Fields
Sometimes an answer for a Text variable must span two or more fields, meaning an answer must wrap from one field to the next. To allow for this, you must group the separate fields as a run-on group. When two or more fields are grouped, HotDocs treats the grouping as if it were one field. Once the fields are grouped, you can attach a Text variable to the group.
In the Social Security Number blank, you created nine fields—one for each digit of the employee’s Social Security number. You can group these boxes together, which will allow you to place each digit of the user’s answer in the correct box.
To group the fields in the Social Security Number blank
- Make sure no existing fields are selected by clicking on any white space in the template.
- Press and hold the Shift key while clicking on each of the fields in the Social Security Number blank. All fields in the blank should now be selected.
You can also right-click on the selected fields and choose Group from the shortcut menu.
- Click the Field menu and select Group. A bounding box appears around the fields, indicating that they are now grouped.

Now that you have grouped the fields, you can assign a Text variable to the group as if it were a single field. You will also assign a Social Security number pattern to the variable, similar to the pattern you used for telephone numbers earlier.
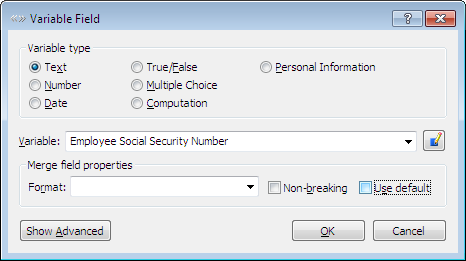
To create a Text variable for the Social Security Number fields
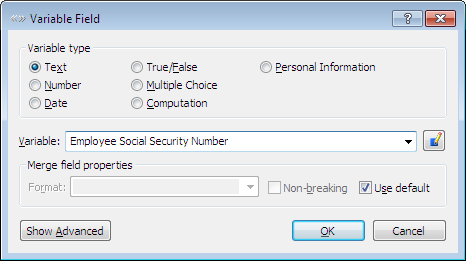
- Double-click the grouped fields in the Social Security Number blank. The Variable Field dialog box appears.
- Select Text from the Variable type group, and type Employee Social Security Number in the Variable box.
- Click the
 Edit Component button. The Text Variable Editor appears.
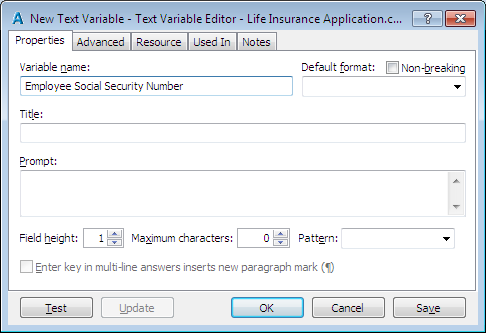
- Select 999-99-9999 from the Pattern drop-down list.
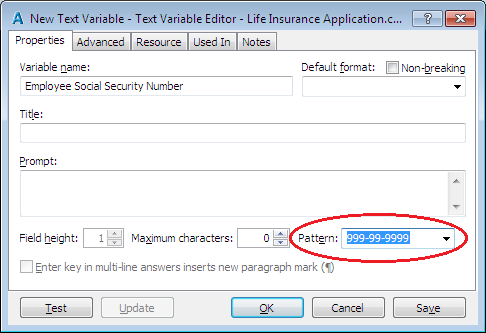
- Click OK to close the Text Variable Editor, but do not close the Variable Field dialog box yet.
The last step in merging the digits of the Social Security number in individual boxes is to assign a format to the variable field.
A format defines how an answer should look when it is merged in the assembled document. For example, if you want a name to appear in all capital letters, you would use the LIKE THIS format. In the case of this Social Security number, you will use a format to keep HotDocs from displaying the hyphens, since they are already part of the static text of the form.
To assign a format to the Social Security Number fields
- At the Variable Field dialog box (which should still be visible from the previous steps), clear the Use default check box.
- Type XXX_XX_XXXX in the Format box. The underscores in this format tell HotDocs not to print the 4th and 7th characters in the answer, which correspond to the positions of the two hyphens.

- Click OK. The variable is attached to the grouped fields.
Group Lines of Text
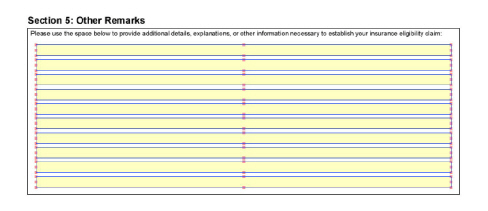
In the previous section, you learned how to assign a Text variable to a group of single-character fields. Another place in the form where you can assign a single variable to a group of fields is in the Other Remarks section. In that section, there are 10 fields that should act as one—when the user types an answer, it should flow from one line to the next. You will group these fields and attach a Text variable to the group.
To group the fields in the Other Remarks section
- Press and hold the Shift key while drawing a box around all of the fields in the Other Remarks section. All fields in the section should now be selected.
- Click the Field menu and select Group. A bounding box appears around the fields, indicating that they are now grouped.
- Click the
 Variable Field button. The Variable Field dialog box appears.
 - Select Text from the Variable type group and type Other Remarks in the Variable box.
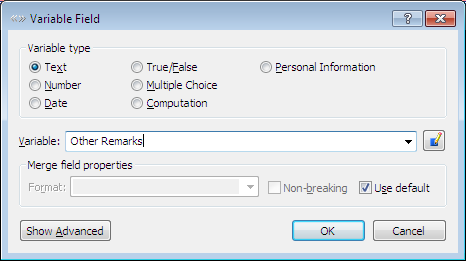
- Click the
 Edit Component button. The Text Variable Editor appears.
 - Change the Field height to 6.

- Click OK to close the Text Variable Editor, and then click OK to close the Variable Field dialog box. The Text variable is attached to the grouped fields.
Conclusion
You are now finished with this lesson. In it, you learned how to create Text variables and attach them to answer fields in your template. You also learned how to assign patterns to Text variables, create run-on groups of multiple fields, and allow multiple-line answers for Text variables.
Click the ![]() Save Form button to save the template. If you do not want to go on to Lesson 5 at this time, choose Exit (File menu). Then exit HotDocs.
Save Form button to save the template. If you do not want to go on to Lesson 5 at this time, choose Exit (File menu). Then exit HotDocs.