Lesson 8: Create a List Using a Table
Overview
In this lesson, you will learn how to automate tables in form templates so they can gather and display lists of answers. To do this, you must first add the variables that appear in the table to a repeated dialog. Then you must group the fields in the table and attach the repeated dialog to the group of fields.
You will also learn how to filter the list of answers that appear in the table. For example, if a repeated dialog contains five sets of answers, you can use a filter to only display those answer sets that meet a certain condition.
Start the Tutorial
If you are continuing immediately from Lesson 7, skip the instructions for opening the template and proceed to “Group Fields as a Table.”
If you closed the template at the end of Lesson 7, complete the following steps.
To open the tutorial template
- Open HotDocs Developer (choose Start
> Programs > HotDocs 11 > HotDocs Developer).
The My Test Templates library
appears.
If the My Test Templates library does not appear, choose Open Library (File menu), select the library in the default Libraries folder (for example, My Test Templates.hdl), and click Open.
- Select Life Insurance Application and
click
 Edit.
The template appears in HotDocs Automator, ready for you to edit.
Edit.
The template appears in HotDocs Automator, ready for you to edit.
Group Fields as a Table
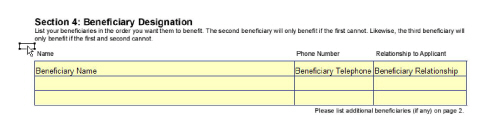
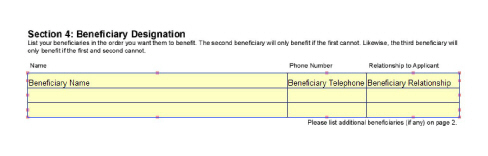
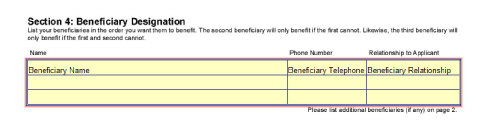
When you created Text variables and attached them to fields in the form, you created variables in the first row of the Beneficiary Designation table. With those variables in place, you can now group all of the fields in this section as a table. When fields are grouped as a table, you can assign a REPEAT instruction to the group, which instructs HotDocs to merge each set of answers in a repeated dialog in a new row of the table.
To group the table fields
- Press and hold the Shift key. Notice that the mouse cursor changes to show a pointer with a bounding box.
- While still pressing Shift, click and hold the mouse button, dragging it from the top-left corner of the Beneficiary Designation table to the bottom-right corner.
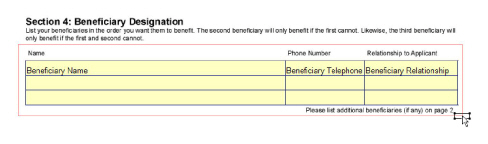
As you do this, HotDocs displays a bounding box around the group of fields.
- Release the mouse button first, and then release the Shift key. Every field in the table is selected.
When grouping table fields, you can also right-click and select Group as Table from the shortcut menu.
- With the fields selected, choose Group as Table (Field menu). A group box appears around the fields.
Create a Repeated Dialog
The next step is to create a repeated dialog that contains the variables used in the table.
Creating the dialog identifies the variables in the table as repeating variables, or variables that store lists of answers.
To create the Beneficiary Designation dialog
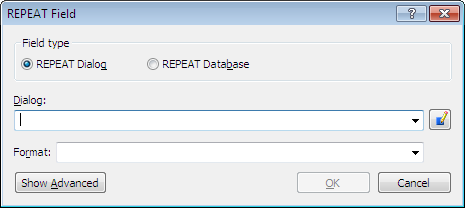
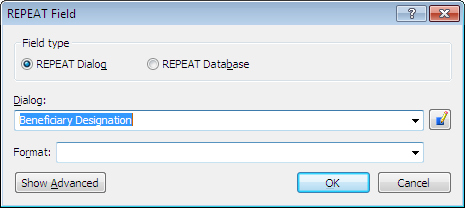
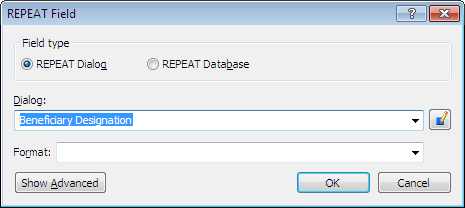
- Double-click the table. The REPEAT Field dialog box appears.
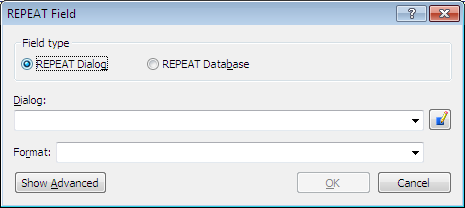
- Make sure REPEAT Dialog is selected in the Field type group.
- Type Beneficiary Designation in the Dialog box.
- Click the
 Edit Component button. The Dialog Editor appears.
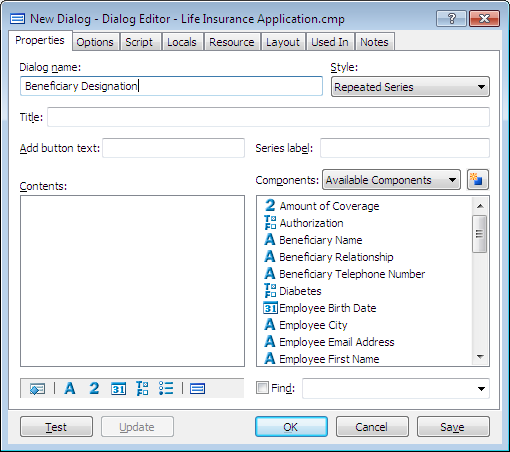
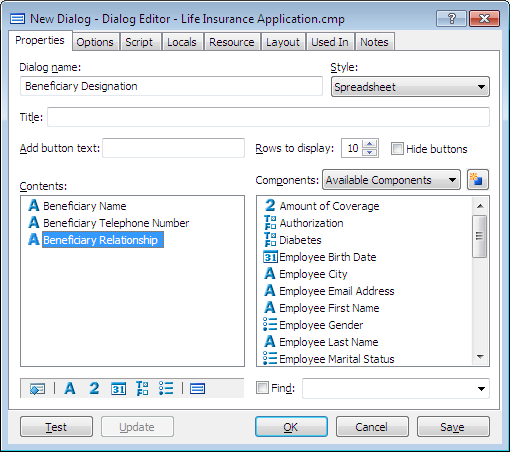
- Select Spreadsheet from the Style drop-down list.
The Spreadsheet style displays all of the variables in a spreadsheet so the user can enter answers in a single dialog. Another style, the Repeated Series, causes HotDocs to display the same information-gathering dialog over and over until all answers are entered.
- From the Components list, drag the following variables into the Contents box (you may have to scroll through the list to see the variable):
Beneficiary Name
Beneficiary Telephone Number
Beneficiary Relationship
- Click OK at both the Dialog Editor and the REPEAT Field dialog box.
Automate the Beneficiary Designation Continuation Table
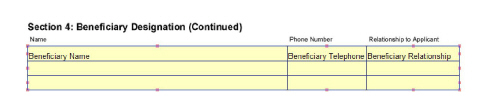
The Beneficiary Designation table is split between two pages of the form. So far, you have only grouped the fields on the first page. Because HotDocs Automator does not allow you to group fields across page boundaries, you must group the fields in the continuation table separately from the initial table on the first page.
Before grouping the fields, you must attach variables to the fields in the first row. One way you have learned to do this is by selecting the field and clicking the ![]() Variable Field button. Another way you can do this is by dragging variables from Component Manager and dropping them on fields in your template.
Variable Field button. Another way you can do this is by dragging variables from Component Manager and dropping them on fields in your template.
To attach variables to the first row of the continuation table
- Scroll to the top of the second page so you can see the continuation table.
To display Component Manager next to the Automator window, adjust the width of Component Manager and click the
 Arrange Windows button. HotDocs arranges the windows so you can work in both simultaneously.
 - Click the
 Component Manager button. The Component Manager window appears.
 - In the Components list, select Beneficiary Name and, while holding the mouse button down, drag the variable from Component Manager to the first field in the Name column, then release the mouse button. The variable name appears in the Name field.

- Repeat step 3 to drag the Beneficiary Telephone Number and Beneficiary Relationship variables to the corresponding fields in the first row of the continuation table.
- Close the Component Manager window.
Now that you have attached variables to the first row of the continuation table, you must group the fields as a table and attach the repeated dialog to the table, just as you did on the first page.
To automate the continuation of the Beneficiary Designation table
- While pressing Shift, click and hold the mouse button, dragging it from the top-left corner of the continuation table to the bottom-right corner.
- Release the mouse button. Every field in the table is selected.
You can also select Group as Table from the shortcut menu.
- With the fields selected, choose Group as Table (Field menu). HotDocs places a group box around the fields.
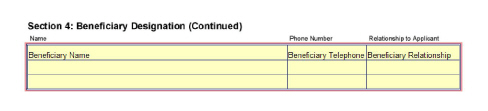
- Double-click the grouped fields. The REPEAT Field dialog box appears.
- Select Beneficiary Designation from the Dialog drop-down list, and then click OK. The repeated dialog is assigned to the grouped fields.
Filter Answers in a Table
If you were to assemble the document now, HotDocs would treat both tables identically—if you entered answers for three beneficiaries, HotDocs would insert the same answers on both pages. Instead, you want to insert the first three beneficiaries on the first page, and the remaining beneficiaries on the second page. You will use two filters (one for each table) to achieve this result.
To assign a filter to the first table
- Double-click the Beneficiary Designation table on the first page. The REPEAT Field dialog box appears.
- Click Show Advanced. Advanced properties for the table appear.
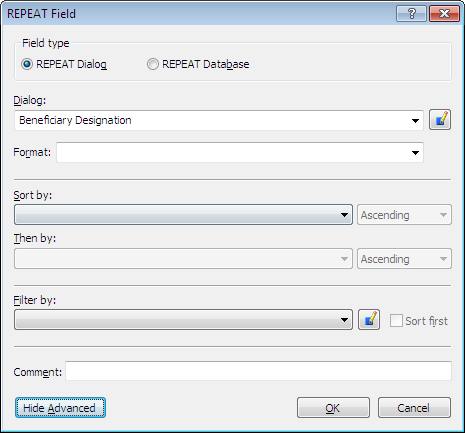
- Click the
 Edit Component button next to the Filter by drop-down list. The Computation Editor appears.
 - Enter Beneficiary Filter 1 in the Variable name field.
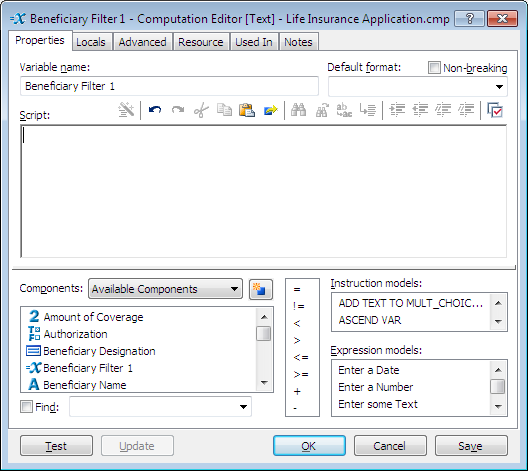
- Enter the following in the Script box:
COUNTER <= 3
As HotDocs processes the REPEAT field, it evaluates this script for each repetition of the dialog. If the number of the current repetition, COUNTER, is less than or equal to 3, the answers for that repetition are merged into a new row of the table. Any repetitions with a number greater than 3 will be skipped.
- Click OK to close the Computation Editor, and then click OK again to close the REPEAT Field dialog box. The filter computation is created and attached to the table.
Now you must assign a filter to the Beneficiary Designation table on the second page. While the filter for the first table limited repetitions to those less than or equal to 3, the filter for the second table must limit repetitions to those greater than 3.
To assign a filter to the second table
- Double-click the Beneficiary Designation (Continued) table on the second page. The REPEAT Field dialog box appears.
- Click Show Advanced. Advanced properties for the table appear.
- Click the
 Edit Component button next to the Filter by drop-down list. The Computation Editor appears.
 - Enter Beneficiary Filter 2 in the Variable name field.
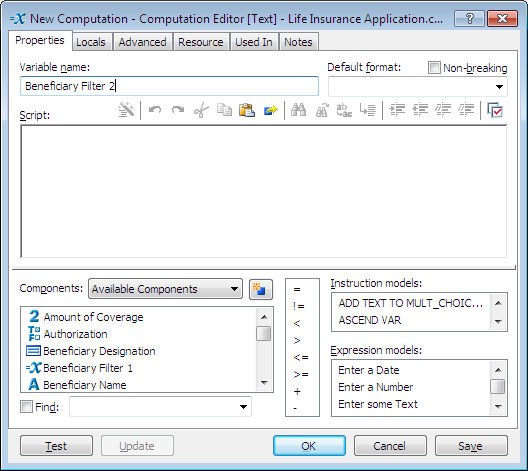
- Enter the following in the Script box:
COUNTER > 3
If the number of a repetition is greater than 3, this script will evaluate to TRUE and HotDocs will merge that repetition’s answers into a new row of the table.
- Click OK to close the Computation Editor, and then click OK again to close the REPEAT Field dialog box. The filter computation is created and attached to the table.
Conclusion
You are now finished with this lesson. In it, you learned how to group fields into tables and assign repeated dialogs to those tables. You also learned how to filter which sets of answers from those dialogs are merged into the table fields.
Click the ![]() Save Form button to save the template. If you do not want to go on to Lesson 9 at this time, choose Exit (File menu). Then exit HotDocs.
Save Form button to save the template. If you do not want to go on to Lesson 9 at this time, choose Exit (File menu). Then exit HotDocs.