Lesson 6: Test the Template
Overview
As with any template you are automating, it is always a good idea to test assemble it to make sure it assembles the way you expect. In this lesson, you will test assemble the Collection Letter template you have automated.
Start the Tutorial
If you are continuing immediately from Lesson 5, skip the instructions for opening the template and proceed to “Test the Template.”
If you closed the template at the end of Lesson 5, complete the following steps.
To open the Collection Letter template
- Open your word processor and click the
 HotDocs button. The My Test Templates library appears.
If the My Test Templates library does not appear, choose Open Library (File menu), select the library in the default Libraries folder (for example, My Test Templates.hdl), and click Open.
- Select Collection Letter and click
 Edit. The template appears, ready for you to edit.
Test the Template
Based on the automation you have done in the template, when you test the Collection Letter template, HotDocs should present a list of unpaid invoices. When you select a specific invoice, it should automatically select and merge the information about the client whose name is on the invoice.
To test the template
- At the template, click the
 Test Assemble button. A test assembly window appears, showing the list of unpaid invoices.
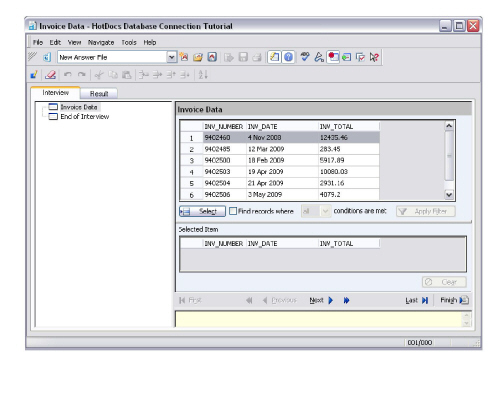
You can also double-click a record and HotDocs will add it to the Selected Item list. To clear a selection, click Clear.
- Click the first record and then click
 Select. HotDocs adds the record to the Selected Item list.
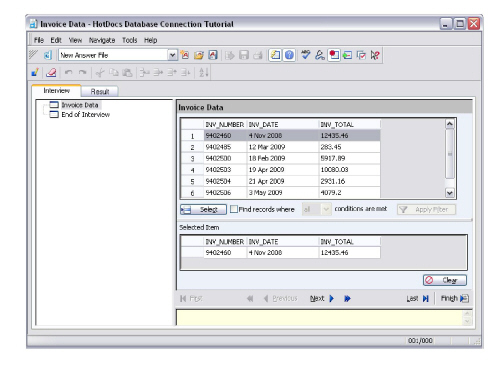
- Click the Document Preview tab. HotDocs displays a copy of the assembled document with all the correct information merged into the document, including the client information which was automatically retrieved from the database.
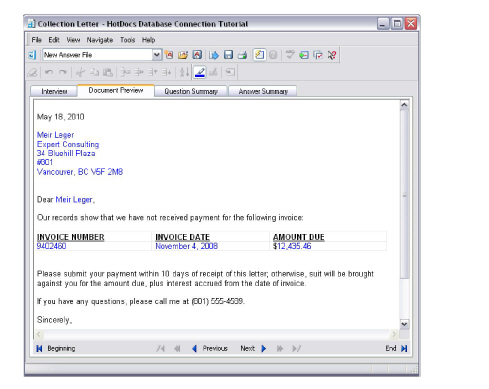
- Click the Interview tab again to return to the database selection dialog.
- Select a different record (by choosing the record and clicking the
 Select button) and click the Document Preview tab. The information in the assembled document changes, based on the new selection you have made.
 - Close the test assembly window, and then click the
 Save and Close button to close the template.
 - Exit HotDocs.
Conclusion
Congratulations! You have completed the HotDocs Developer Tutorial. You should now have a basic understanding of how to automate your own templates. For further instruction and help, please refer to the HotDocs Help.