Lesson 10: Group Variables Into Dialogs
Overview
This lesson teaches you how to group related variables together in dialogs.
As you learned in the last lesson when you test assembled your template, HotDocs automatically creates a default dialog (or a question window) for each variable. When the user assembles the document, HotDocs presents each of these individual dialogs in the order the variables are used in the template.
However, if you want to have more control over the information-gathering process, you can create custom dialogs. To do this, you group related questions together and add text (and other design elements) to the dialog to help the user provide correct answers. You can also control the order in which custom dialogs appear during the interview.
When you add a variable to a dialog, HotDocs creates a link between the variable and the dialog. When an answer is needed for the variable during the interview, HotDocs displays the linked dialog instead of displaying the variable by itself.
When HotDocs assembles a document that contains variables, it reads through the document much like you would—it reads, line by line, all of the text in the template, starting at the top left corner and finishing at the bottom-right corner. As HotDocs encounters variable fields, it checks for two things—1) if the variable has been asked, and 2) if the variable is linked to a dialog. If the variable has already been asked, HotDocs skips it and moves to the next variable or instruction in the template. However, if the variable has not been asked, HotDocs checks to see if it has been included in a dialog. If it has, HotDocs presents the dialog to the user so he or she can answer the questions in it. If the variable is not linked to a custom dialog, HotDocs asks the variable in its own default dialog.
Start the Tutorial
If you are continuing immediately from Lesson 9, skip the instructions for opening the template and proceed to Create the First Custom Dialog.
If you closed the template at the end of Lesson 9, complete the following steps.
To open the tutorial template
- Open your word processor and click the
 HotDocs button, located on
your word processor’s toolbar. The My
Test Templates library appears.
If the My Test Templates library does not appear, choose Open Library (File menu), select the library in the default Libraries folder (for example, My Test Templates.hdl), and click Open.
- Select Employment Agreement and
click
 Edit.
The template appears, ready for you to edit.
Create the First Custom Dialog
How you group variables into dialogs depends on the template and your own preferences. Generally, you begin with the most basic information. In the Employment Agreement, the most basic information pertains to the employee.
To create a custom dialog, you use Component Manager. Component Manager is a tool that lets you work with the different components and properties you use in your template. (These are stored in the component file, which you learned about when you created the new template in Lesson 3.)
To create a dialog
- At the template, click the
 Component Manager button. Component Manager appears.
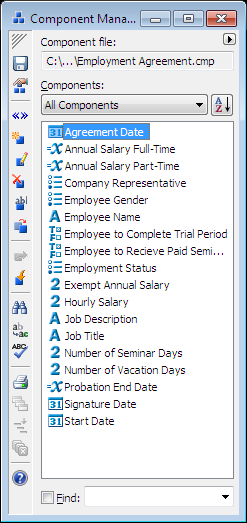
You can arrange both the Component Manager and word processor window so that you can view both windows simultaneously. To do this, adjust Component Manager to the desired width and click the
 Arrange Windows button.
Component Manager lists all of the components associated with the template. It also provides several tools for working with the components. Using Component Manager you can create new components—specifically dialogs.
- Click the Components drop-down button and select Dialogs from the list. The component list is filtered to show only dialogs. (You have not yet created any dialogs, so this list is empty.)
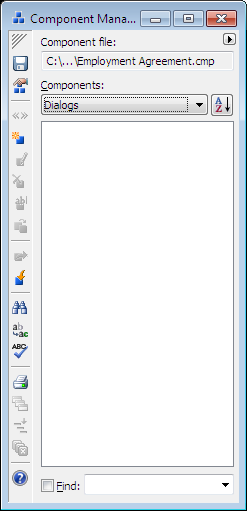
- Click the
 New Component button. The Dialog Editor appears.
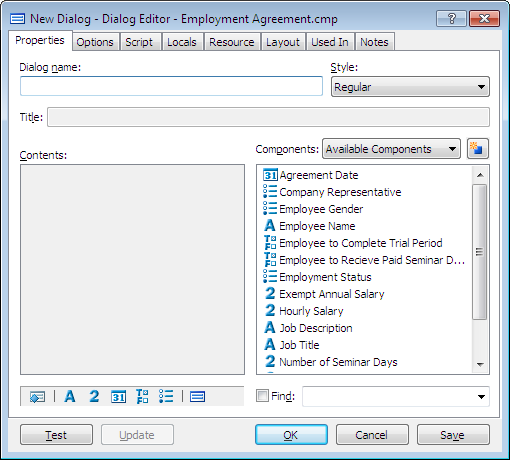
- Type Employee Information in the Dialog name box.
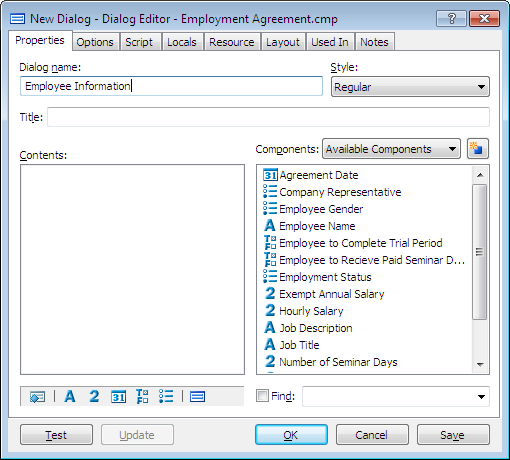
Add Variables to the Dialog
The next step is adding the employee variables to the dialog.
To add variables to a dialog
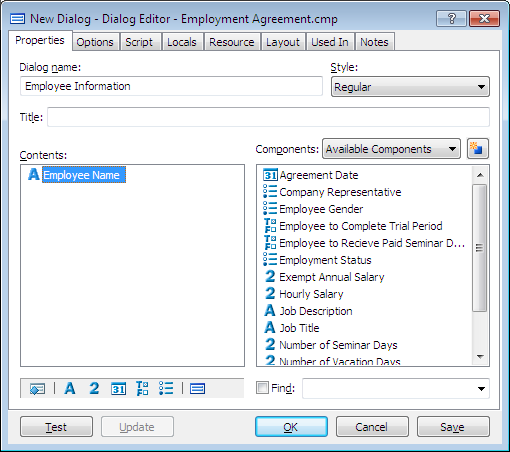
- In the Components list, click on Employee Name and drag it to the Contents box.
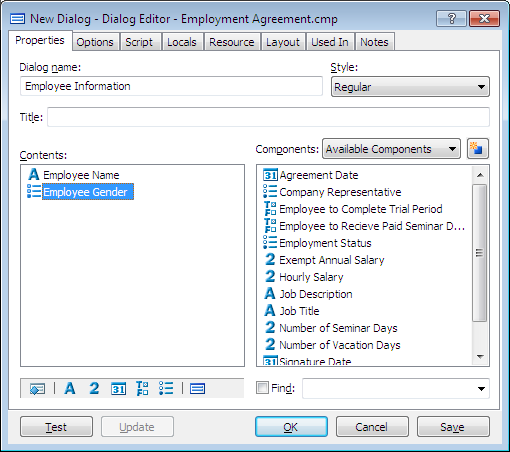
- Drag Employee Gender from the Components list to the Contents box.
- Click Test. A test assembly window appears.
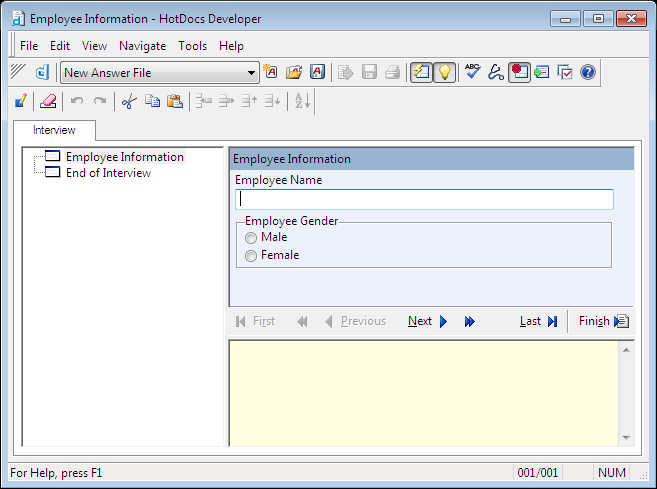
The dialog looks the way it will when it is displayed during the interview.
- Close the test assembly window, and then click OK at the Dialog Editor. The dialog Employee Information is now complete.
Create the Second Dialog
The second dialog you will create will ask the questions about the agreement.
To create the dialog
- At Component Manager, click the
 New Component button. The Dialog Editor appears.
 - Enter Agreement Information in the Dialog name box.
Components you have already added to a dialog are sorted to the bottom of the Components list and appear grayed. This helps you know they have already been included in a dialog.
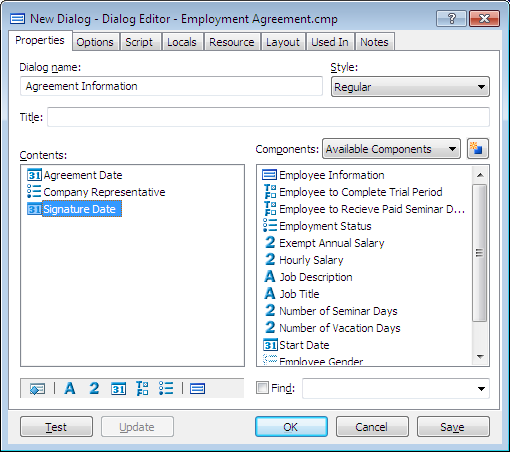
- Drag the following variables from the Components list to the Contents list, in this order:
Agreement Date
Company Representative
Signature Date
- Click OK. The Dialog Editor is closed.
On Your Own
Create the next two dialogs, based on the following information:
| Dialog Name | Components |
|---|---|
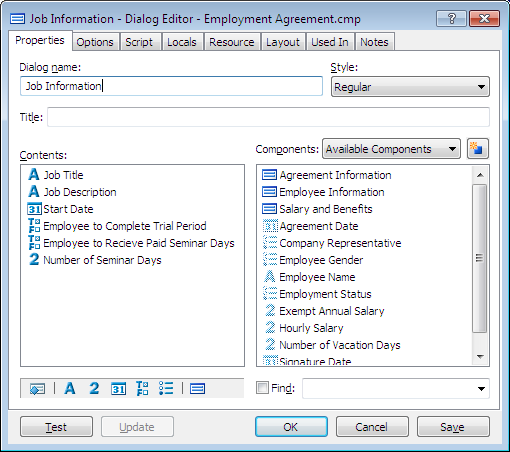
| Job Information | Job Title Job Description Start Date Employee to Complete Trial Period Employee to Receive Paid Seminar Days Number of Seminar Days |
| Salary and Benefits | Employment Status Exempt Annual Salary Hourly Salary Number of Vacation Days |
Make sure you add the variables in the order they are listed in the table.
Group True/False Variables in a Dialog
When you view a dialog that contains True/False variables, they appear as Yes/No questions, like this:

You can select an option that makes these variables appear as check boxes (allowing the user to select multiple answers) or as option buttons (allowing the user to select just one answer). You do this by assigning a selection grouping to the dialog.
To group True/False variables
- At Component Manager, select the Job Information dialog and click the
 Edit Component button. The Dialog Editor appears.
- Click Test. The test assembly window appears.
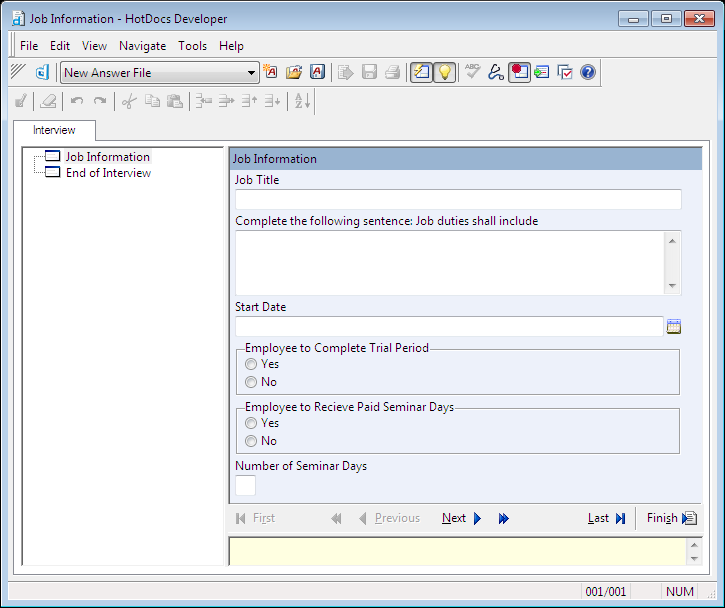
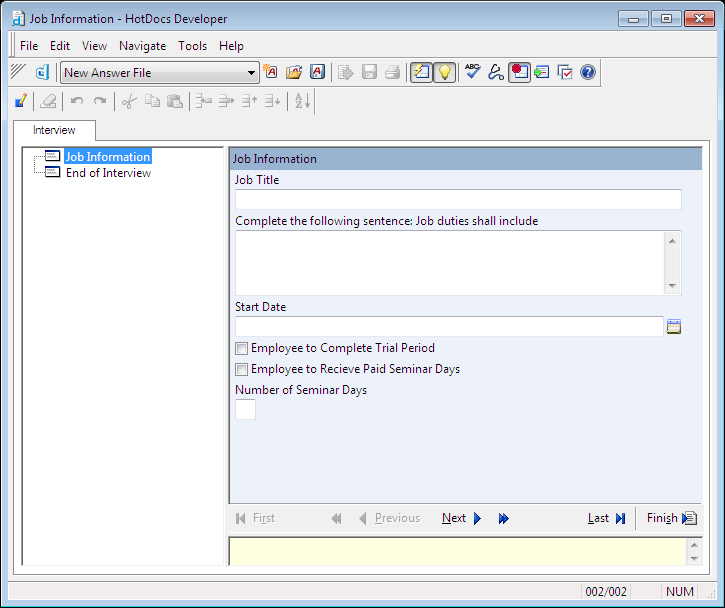
Notice the two True/False variables in the dialog appear as Yes/No questions.
- In the interview outline, click on the Job Information dialog icon and click the
 Edit Component button. The Dialog Editor comes to the front.
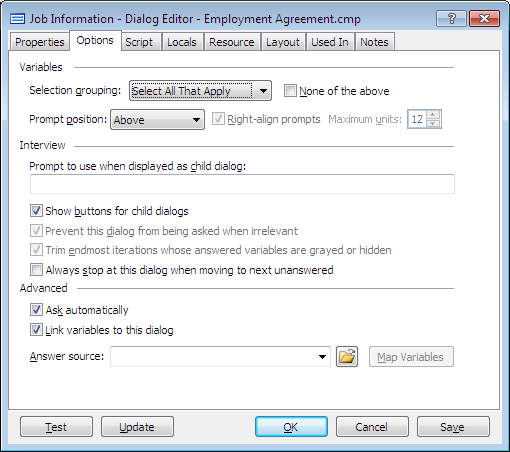
 - Click the Options tab.
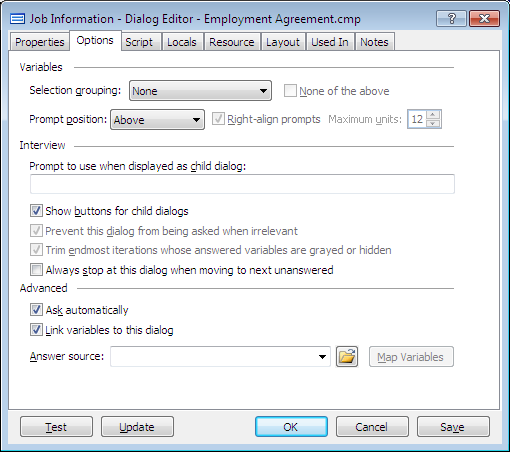
- Click the Selection grouping drop-down button and choose Select All That Apply.
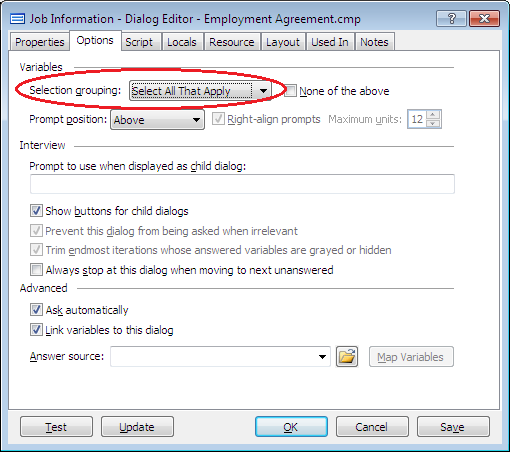
- Click Update. The test assembly window appears again and shows the updated dialog. Note how the two True/False variables now appear as check boxes.
Visually Separate Items in a Dialog
As you review the Job Information dialog, you may notice that you’d like to separate the seminar attendance questions from the rest of the variables in the dialog. You can do this by creating a dialog space element. You can create a single dialog element and use it in any number of dialogs.
To create a dialog element
- Bring the Dialog Editor to the front. (To do this, click on the dialog icon in the interview outline and then click the
 Edit Component button.)
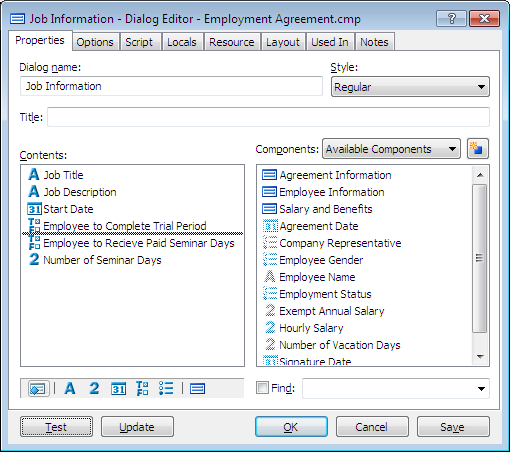
- Click the Properties tab.
You can use dialog elements to include other items in a dialog, such as additional text, horizontal lines, or buttons that calculate values or launch the Web browser, just to name a few.
- Click the
 Create New Dialog Element button and drag it to the Contents list, dropping it between the two True/False variables.
The Dialog Element Editor appears.
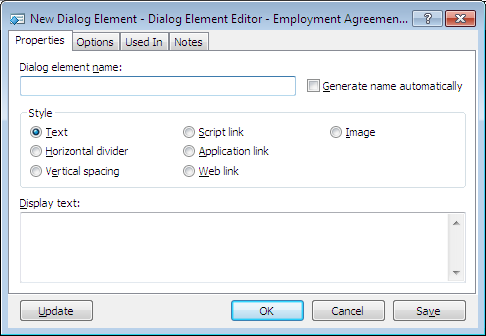
- In the Dialog element name box, enter the text White Space.
- In the Style group, select Vertical spacing.
- Click OK. You are returned to the Dialog Editor.
- Click Update. The test assembly window appears again, showing the updated dialog. Note the extra space between the Trial Period and Paid Seminar Days questions.
- Close the test assembly window and click OK at the Dialog Editor.
On Your Own
Although you already added the White Space dialog element to the previous dialog, it is not grayed in the Components list. This is because dialog elements can appear on multiple dialogs, or even multiple times on the same dialog.
Edit the Salary and Benefits dialog, and add the White Space dialog element you created in the previous section to it. To do this, drag the element from the Components list and drop it between the variables Hourly Salary and Number of Vacation Days. Close the Dialog Editor when you are finished.
Conclusion
You are now finished with this lesson. In it, you learned how to group variables into dialogs. You also learned how to group True/False variables in a dialog so they appear as option buttons or check boxes.
If you do not want to go on to Lesson 11 at this time, close Component Manager by clicking the X in the upper-right corner of Component Manager. Then click the HotDocs ![]() Save and Close button to close the template. Then exit HotDocs.
Save and Close button to close the template. Then exit HotDocs.
If you are continuing on to Lesson 11, click the ![]() Save button to save your work.
Save button to save your work.