Clients Tab
The Clients tab main page contains a filterable table listing all of the firm’s clients and the documents assigned to each client.
Clients Tab Main Page
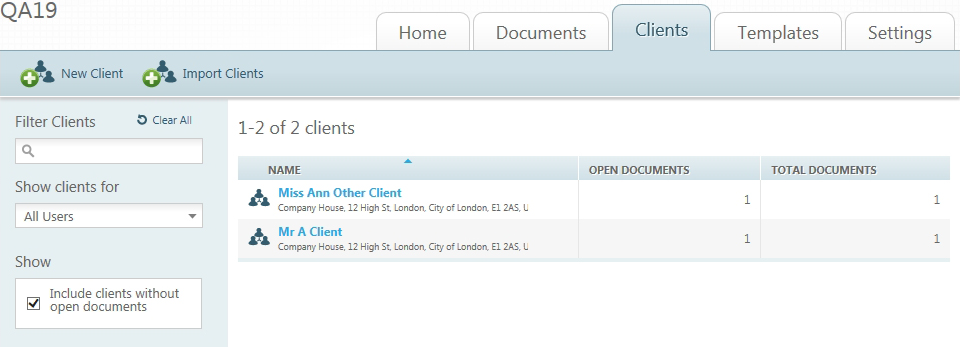
The Clients tab main page displays a table listing the clients for the currently signed in user. You can use the Filter Clients text box to filter the list of displayed clients. The clients table displays the Name and address of the client, the number of Open Documents, and the number of Total Documents.
Filter Clients Panel
- Filter Clients - enables you to search for clients using keywords. Typing a name in the Filter Clients text box filters the list of clients as you type.
- Show Clients for – allows the option to view all clients for a specific user. The default setting is to show clients for all users. You should be aware that any text left in the Filter Clients text box continues to act as a filter for the list of clients of each user you select in the Show clients for drop-down list. Removing the text removes the filtering for all users.
- Show - Select this check box to also show clients whose documents are not listed as open.
All of these components work interactively to arrive at a final display list. Changing your choice in any area affects the list displayed in the clients table.
Clients Tab Main Taskbar
The main taskbar under the Clients tab enables you to create New Clients (below) or to Import Clients.
New Client Page
Selecting New Client from the Clients tab main taskbar opens the new client page.

Type the client's details into the fields provided. The minimum details required are the Name and Email fields. The default Primary Contact for the client is the currently logged in user, however this can be changed by selecting another user from the drop-down list. Click Save once the details have been entered. This adds the client to the list of clients in your firm’s Document Services site.
Import Clients Page
When you click Import Clients in the main taskbar of the Clients tab, Document Services 2.1 allows you to import a large list of clients from a comma-separated values (CSV) file. This allows a quick way for you to populate your Document Services account with your firm’s client list.
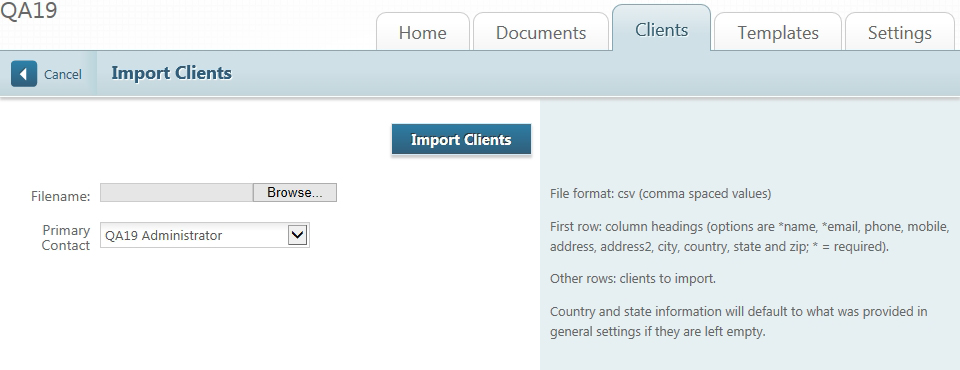
Clicking Browse allows you to find the CSV file you require. The primary contact is automatically set to the currently logged in user but can be changed by utilizing the drop-down list.
Instructions for formatting the CSV file can be found in the right hand panel of the Import Clients Page.
Client Details Page
Clicking on the Name of a client from the client table, opens the Client tab’s edit page to view (on the left) the client’s properties and, on the right, a Documents table with headings for:
- Description—the title you supplied when you created the document
If you leave the default title Document Services supplies when you create the document, the description provides a shorter version of the titles of the templates you add to the document, plus the name of the client (if any) you add, as well as the date on which you create the document.
- Last Activity—a date/time stamp of the last time anyone worked with that document
- Status—provides icons (and tool tips) describing whether the document is:
- Archived
- Open
- Waiting for Client Interview
You can click each column title to rearrange the display order.
Under Recipients, The details of these documents can be viewed by clicking on their titles.

The Recipients are used in conjunction with the client interview feature. The recipient is the contact who can receive the client interview emails and will fill them out. Once a recipient has been added, their name and email information may be edited by clicking Edit Recipient in the Actions column. A recipient may also be deleted by clicking Delete Recipient.
Client Details Taskbar
The Client details page taskbar has buttons to create a New Document for the currently displayed client or to Delete (the) Client.