Action Links Overview
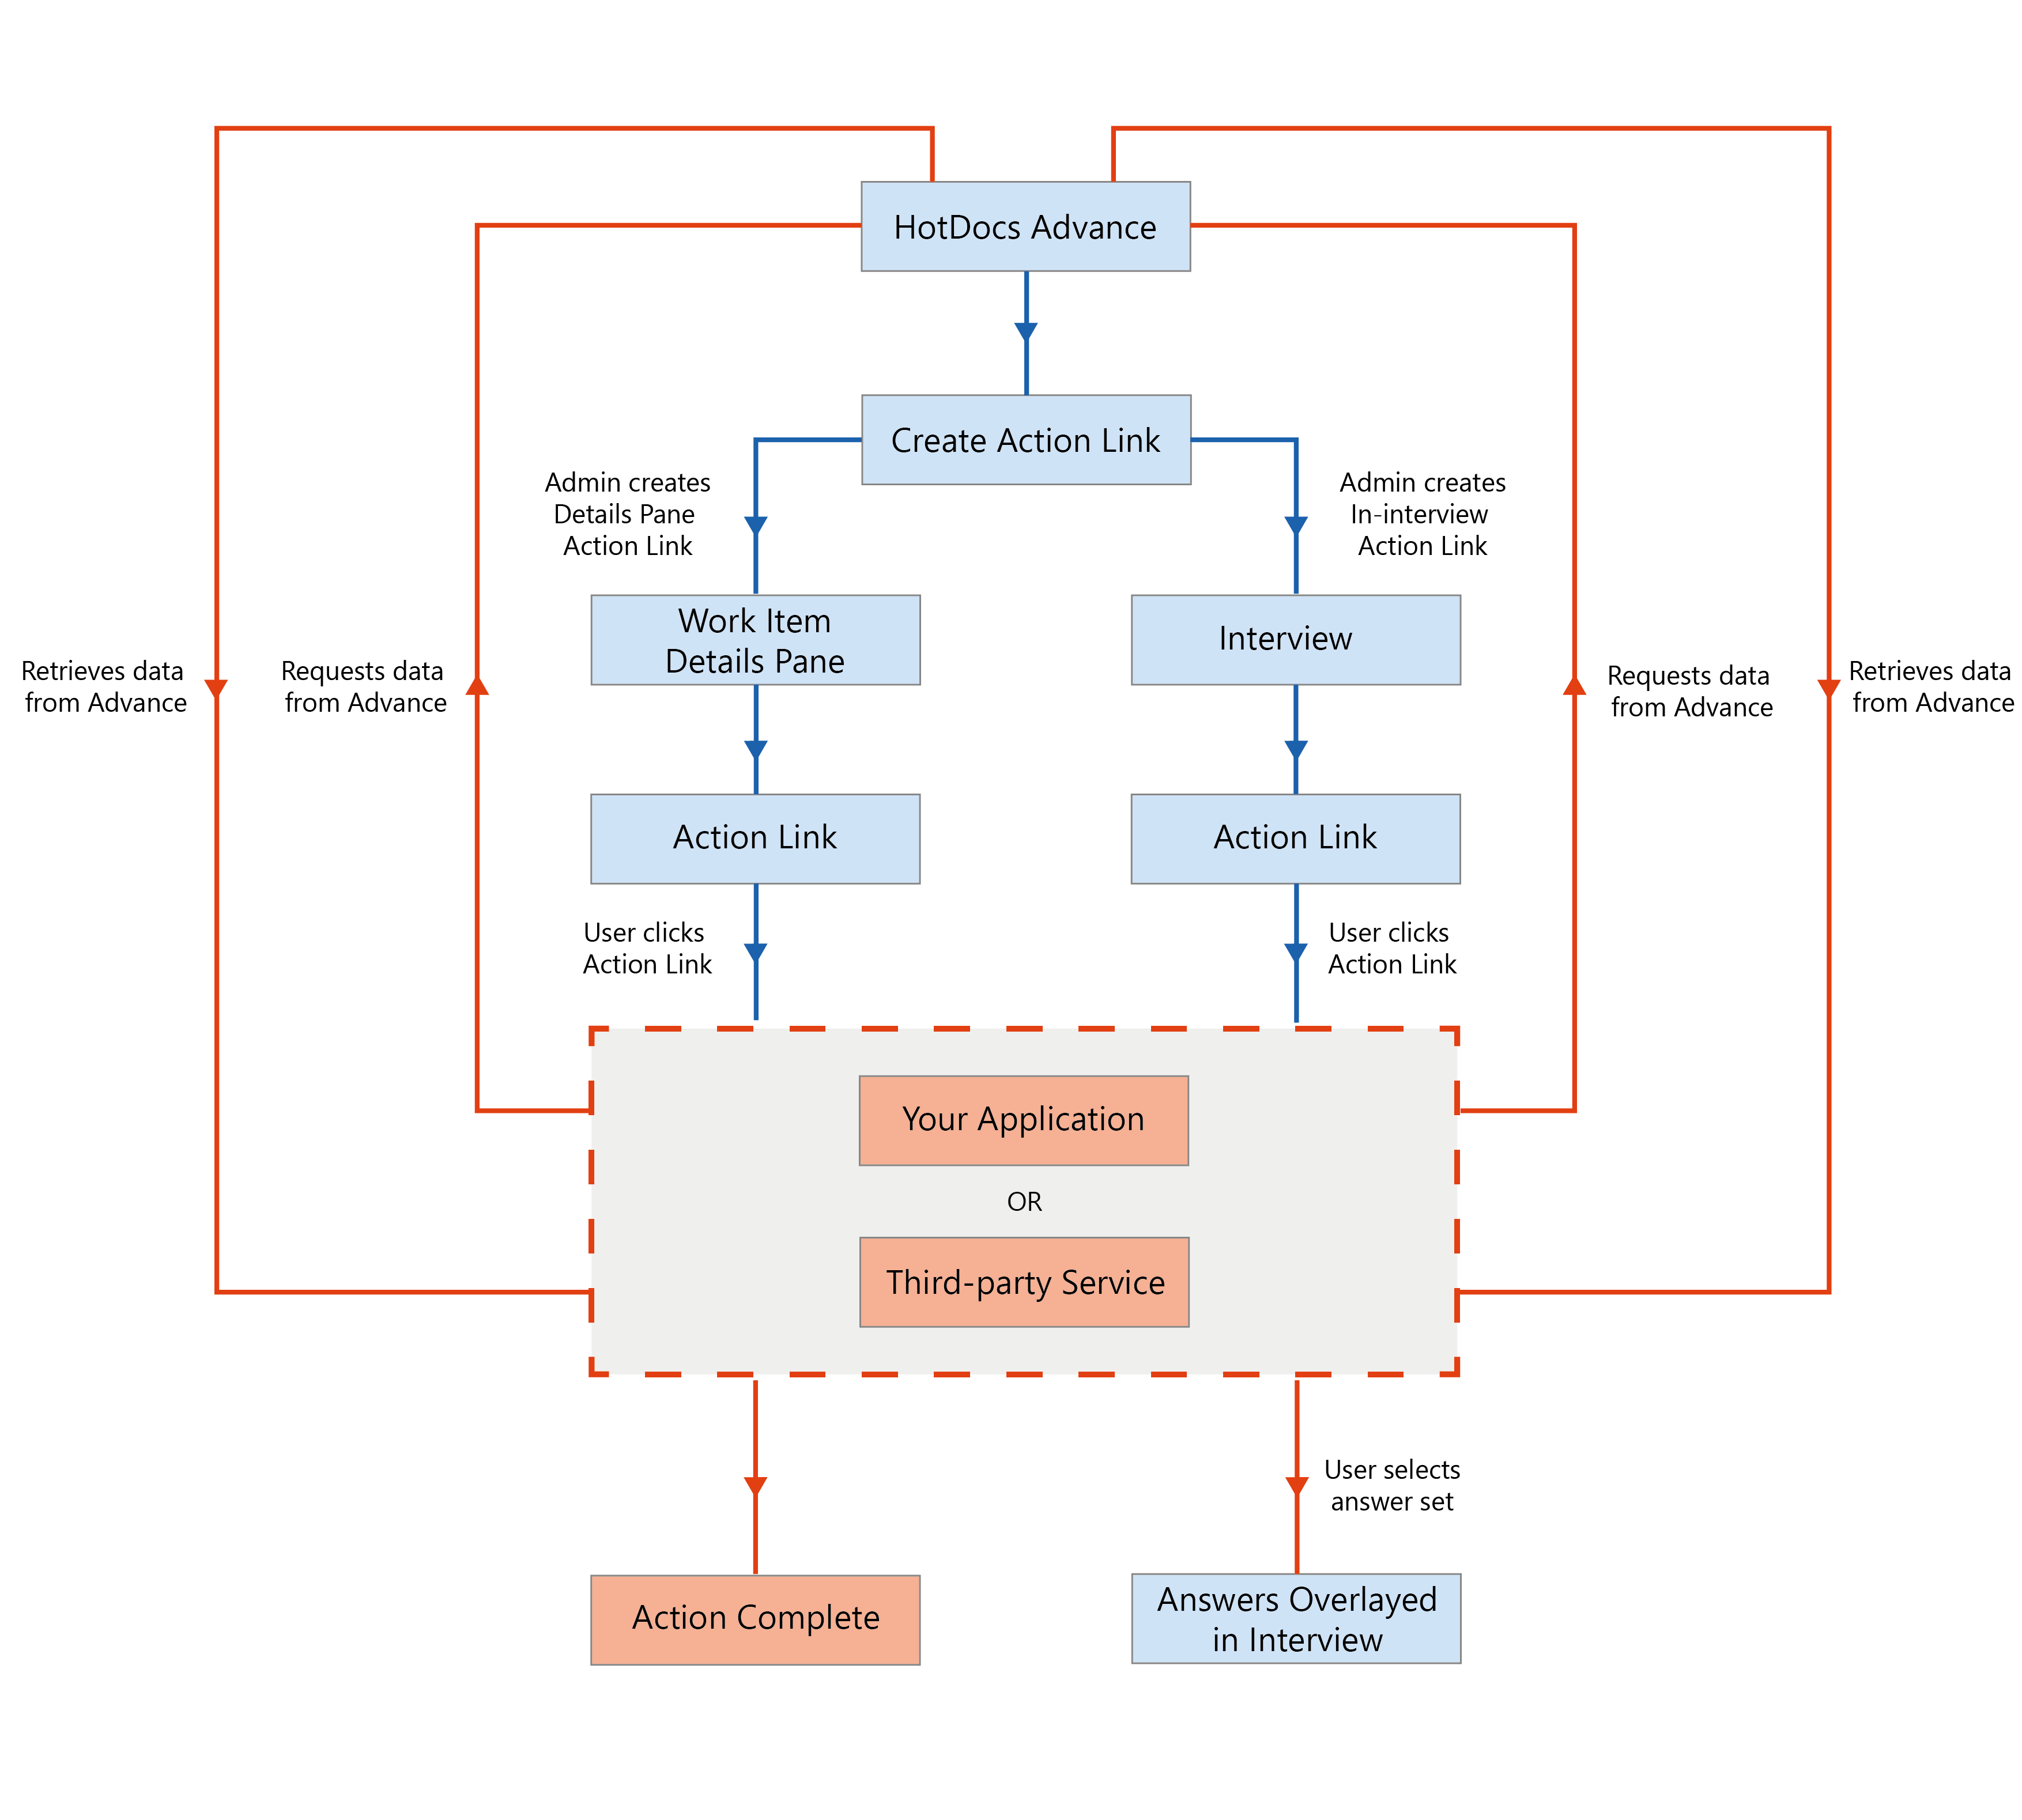
An Action Link enables you to add a custom button that activates an external workflow. Users then interact with the external workflow through a new window opened by Advance.
For example, if you require assembled documents to be electronically signed, you can provide an action link that enables users to activate a 'document signing' endpoint on your own web application. This endpoint then retrieves the documents and passes them to a third-party electronic signature service. Advance opens a new window for the user, displaying the user interface of your own application.
Overview
An action link enables site and integration administrators to give users access to external workflows. The action link points to a specific endpoint on your own web application that can consume data from Advance. This enables users to perform actions outside of the scope of Advance, using Advance data with workflows from third-party applications.
Action links are useful when you want to create a shortcut from Advance to an external workflow. For example, emailing a document to a client directly from the Advance interface.
Advance displays the action link to your users as a button on the work item details pane. When a user clicks the button, Advance sends a request to the URL specified in the action link. It is then the job of this endpoint to request the information required from Advance, then pass the information to the third-party service. In this way, your web application acts as an intermediary between Advance and the third-party service.

Common Tasks
Among others, action links enable you to perform the following common tasks:
Workflow
You should already have an action link endpoint on your own web application before you create a new action link.
Navigate to the Administration section and click Manage Action Links. Create a new action link by clicking Create New Action Link and entering the details of the action. Once completed, your new action link is displayed in the action links table.
This functionality works with work items, and is therefore not available with quick documents.
Action Link Parameters
When you create an action link, you must provide the following details:
You can display your action link on the work item details pane and in the interview. For more information, see In-interview Action Links Overview.
- Name — the name of the action link.
- URL — the full URL of your web application endpoint.
- Action link active — select the Action link active checkbox to set the state to active (default); inactive action links are not displayed to the user.
- Access — select where the action link will be available:
- In Interviews - the action link will be displayed in the interview.
- Interview event name - the interview event name which matches the name of your interview event dialog element.
- On the work item details pane - the action link will be displayed in the work item details pane.
- Label - the text displayed on the button.
- In Interviews - the action link will be displayed in the interview.
- Permissions — the work groups that can display the action link.
Access Permissions
When you create an action link, you select the work groups in which you want the action link button to be available. An action link is only visible to users who are members of the selected work groups.
Action Link Endpoint
An action link endpoint is an endpoint on your own web application that consumes data sent from Advance. You must have this endpoint for action links to function.
When a user clicks an action link, Advance sends a POST request to your endpoint using the URL you specify when creating the action link. The request contains form data about the work item on which the user clicked the action link. Your endpoint can then process the form data and return an HTML page to Advance. Advance then displays the HTML page returned from the endpoint to the user.
Common Reference Topics
Among others, the following reference topics may relate to this conceptual area: