Lesson 2: Create a New Form Template
Overview
The remaining lessons in this tutorial will teach you how to create and automate a Life Insurance Application form template like the one you assembled in Lesson 1.
When you create a form template, you must first create or find a document file, such as a PDF, to use as the basis for the template. For this lesson, you will use a sample life insurance application, which was installed with HotDocs for use in this tutorial. You will learn how to create a new form template based on that document and add it to your template library.
After creating the template, you will also learn about the HotDocs Automator window, where you will automate the form template in subsequent lessons.
Start the Tutorial
If you closed HotDocs at the end of Lesson 1, complete the following steps to start HotDocs.
To start HotDocs
- Open HotDocs Developer (choose Start > Programs > HotDocs 11 > HotDocs Developer). The HotDocs library window appears, showing the last library you had open.
Before you can create a form template, you must open the library in which you want it to appear. In this tutorial, you will create a form template in the same library you created in the previous HotDocs tutorial. If you did not complete that tutorial, refer to Create a New Template Library to create the library.
To open your test templates library
- Choose Open Library (File menu), select the My Test Templates library in the default Libraries folder, and click Open.
Create a New Form Template
You will now create the Life Insurance Application template. You will use an existing form document as the basis for the template.
To create a new life insurance application form template
- Click on the My Test Templates folder.
- Click
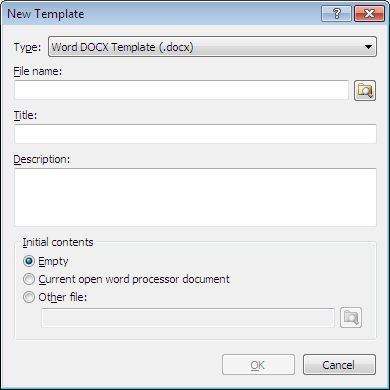
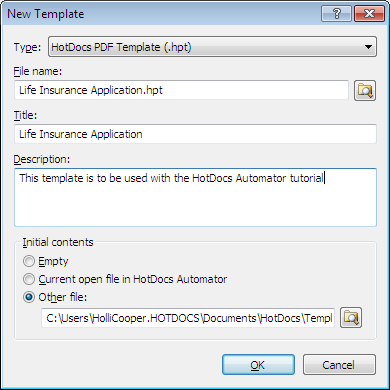
 New Template. The New Template dialog box appears.
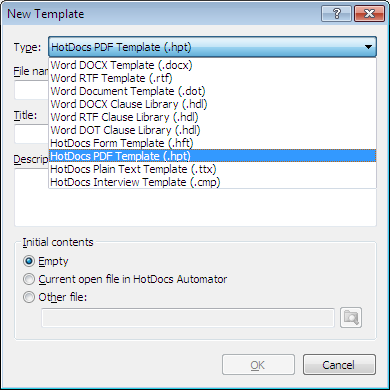
 - From the Type drop-down list, select HotDocs PDF Template (.hpt).
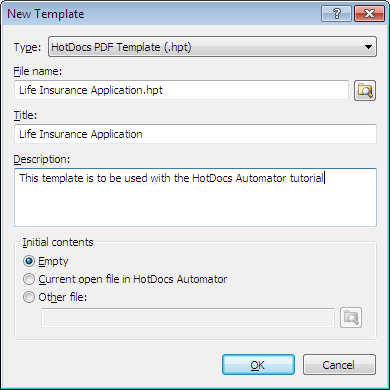
- Type Life Insurance Application in the File name box.
- Click in the Title box and accept the suggested title, Life Insurance Application.
Template titles and descriptions help the user identify the template at the HotDocs library.
- Type This template is to be used with the HotDocs Automator tutorial in the Description box.
- In the Initial contents group, select Other file and click the
 Browse button. The New Template Initial Contents dialog box appears.
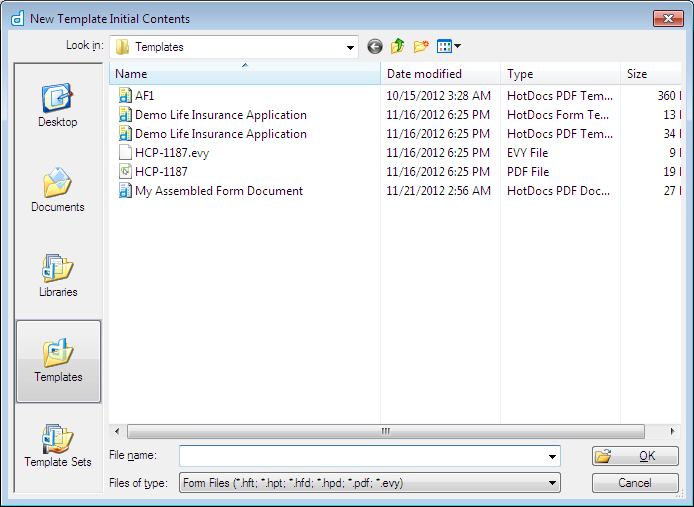
The file you need is located in your default Templates folder. If that folder is not displayed in the New Template Initial Contents dialog box, click the Templates button in the left-hand navigation pane.
- Select HCP-1187.pdf.
- Click OK to return to the New Template dialog box. The document’s folder path and file name appear in the Other file box.
- Click OK. The new form template is created and opened in HotDocs Automator. The template is also added to the template library.
When you create a form template, HotDocs automatically creates a component file, just like it does when you create a text template. HotDocs gives the component file the same name as the template file. In this instance, HotDocs has created a component file named Life Insurance Application.cmp (since your template file is named Life Insurance Application.hpt.
Familiarize Yourself with the HotDocs Automator Window
When you open a form template in HotDocs Automator, you can use the buttons on the toolbar to edit the template. The buttons on this toolbar are, from left to right:
![]() HotDocs Library
HotDocs Library
![]() New Template
New Template
![]() Open Form
Open Form
![]() Save Form
Save Form
![]() Print Form
Print Form
![]() Field Properties
Field Properties
![]() Answer Font
Answer Font
![]() Detect Field
Detect Field
![]() Align Fields
Align Fields
![]() Undo
Undo
![]() Redo
Redo
![]() Variable Field
Variable Field
![]() Edit Component
Edit Component
![]() Component Manager
Component Manager
![]() Test Assemble
Test Assemble
![]() Fill Tool
Fill Tool
![]() Select Tool
Select Tool
![]() Select Text and Fields Tool
Select Text and Fields Tool
![]() Scroll Tool
Scroll Tool
![]() Zoom Tool
Zoom Tool
![]() Page Width
Page Width
![]() Full Page
Full Page
![]() Show Fields
Show Fields
![]() Show Variables
Show Variables
![]() Show Thumbnails
Show Thumbnails
![]() Previous Page
Previous Page
![]() Next Page
Next Page
![]() HotDocs Options
HotDocs Options
![]() Help
Help
Conclusion
You are now finished with this lesson. In it, you learned how to create a form template based on an existing document file, and how to add the template to your template library. Additionally, you learned about the buttons on the HotDocs Automator toolbar.
To save your template, you can also press Ctrl+S.
Click the ![]() Save Form button to save the template. If you do not want to go on to Lesson 3 at this time, choose Exit (File menu) to close HotDocs Automator. Then exit HotDocs.
Save Form button to save the template. If you do not want to go on to Lesson 3 at this time, choose Exit (File menu) to close HotDocs Automator. Then exit HotDocs.